Appointment booking addon for Gravity Forms.
- Created: January 3rd 2018
- Latest Update: March 01, 2023
- Version: 1.10.0
- By: WpCrunch
- https://codecanyon.net/user/wpcrunch
Appointment booking addon for Gravity Forms.
Make sure you already installed and activated GravityForms.
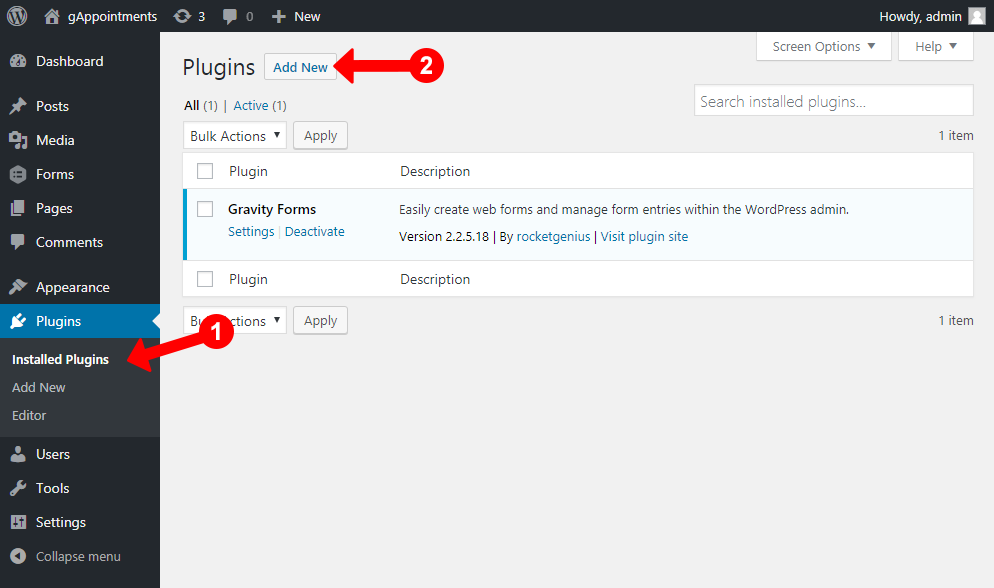
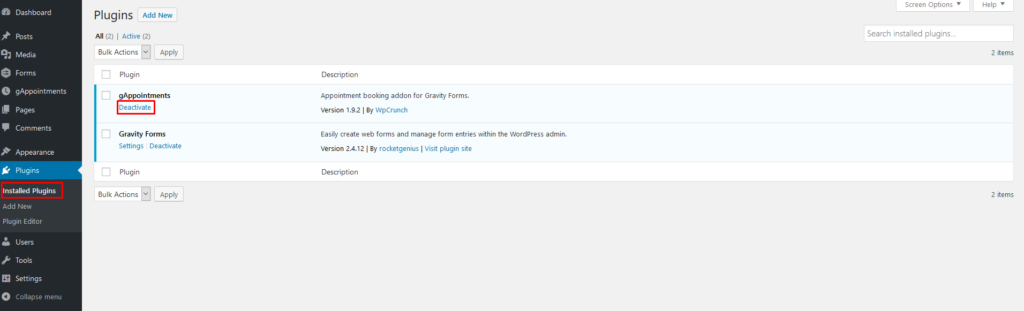
Step 1. Log into your WordPress Admin area.
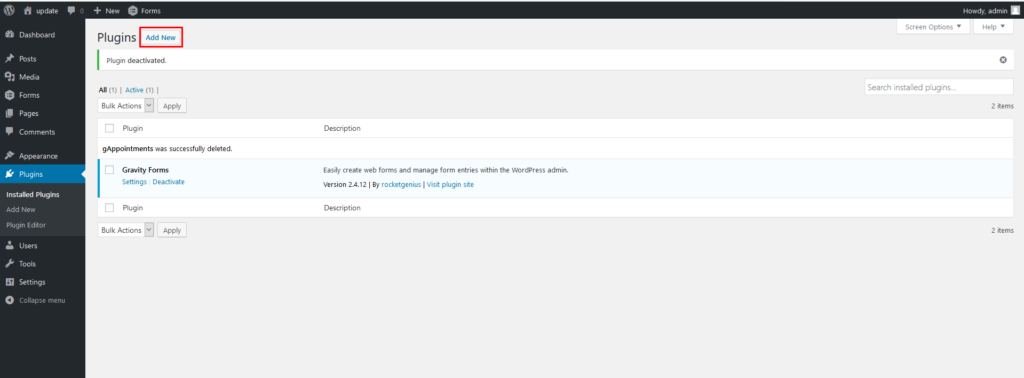
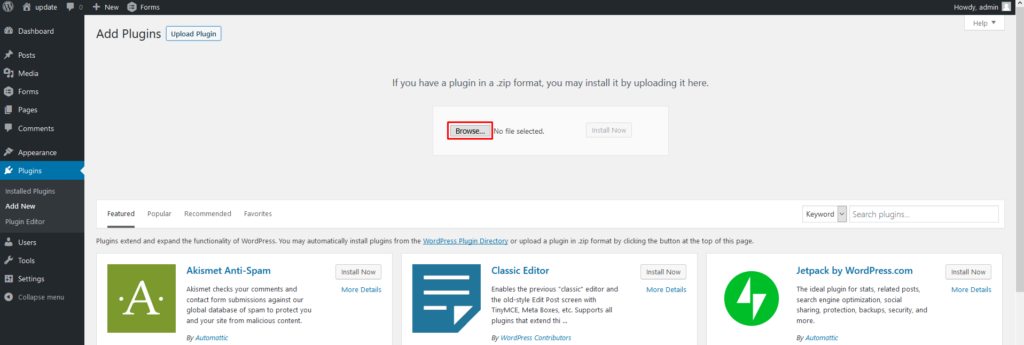
Step 2. Look down the left hand column for “Plugins” and then click on the button “Add new”.
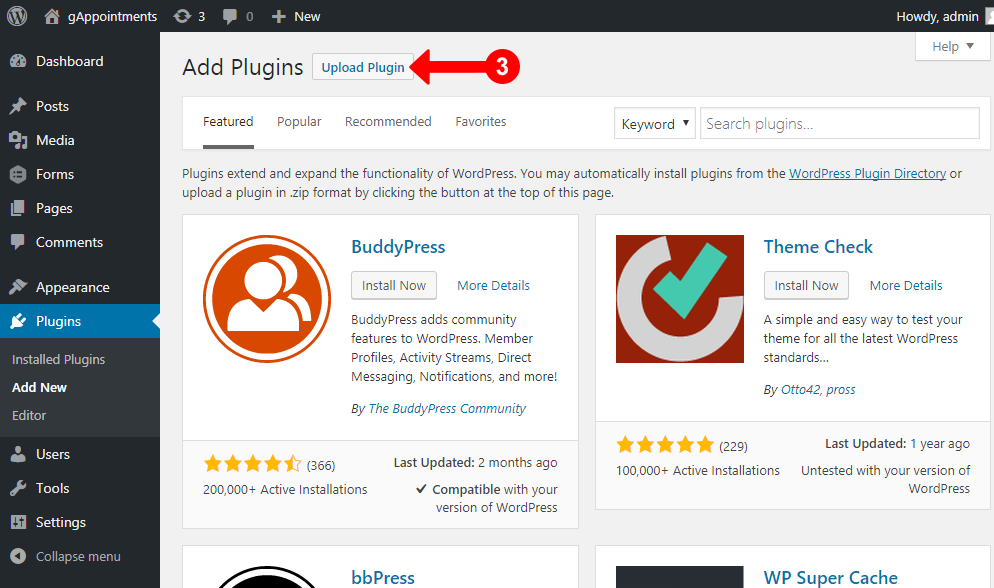
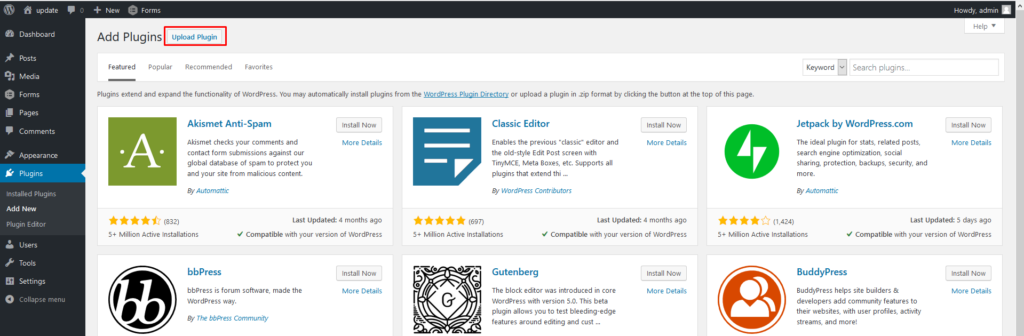
Step 3. In the “Add new” page, click “Upload Plugin” on top
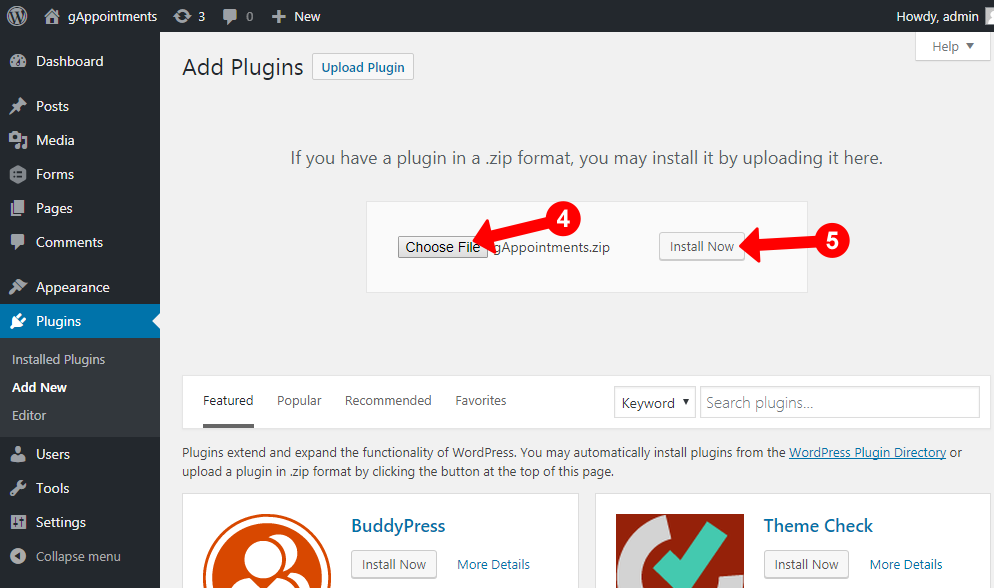
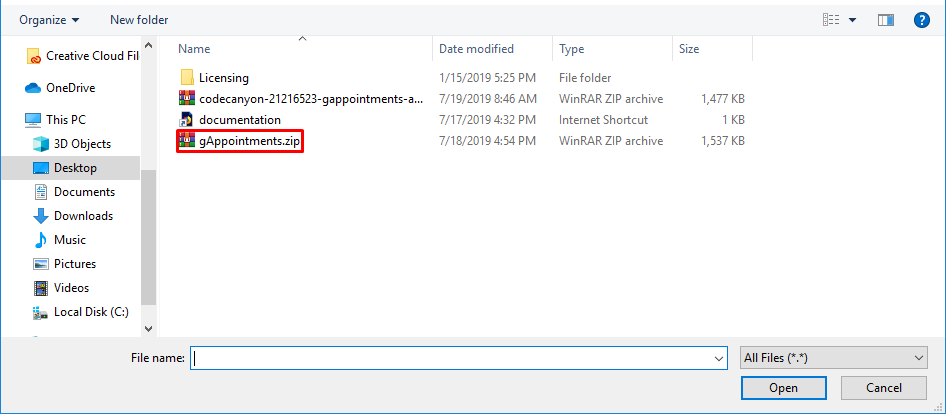
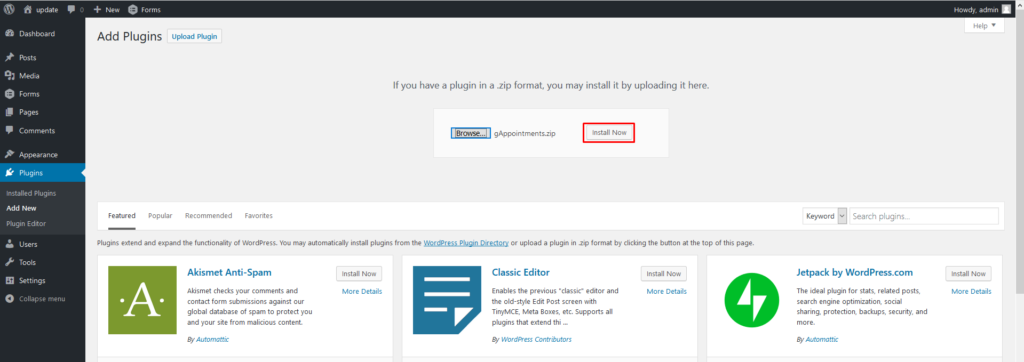
Step 4. In the “Upload” page, click “Choose file” to browse for the theme installation file in [path-to-your-downloaded-package]/gAppointments.zip). Click “Install Now”.
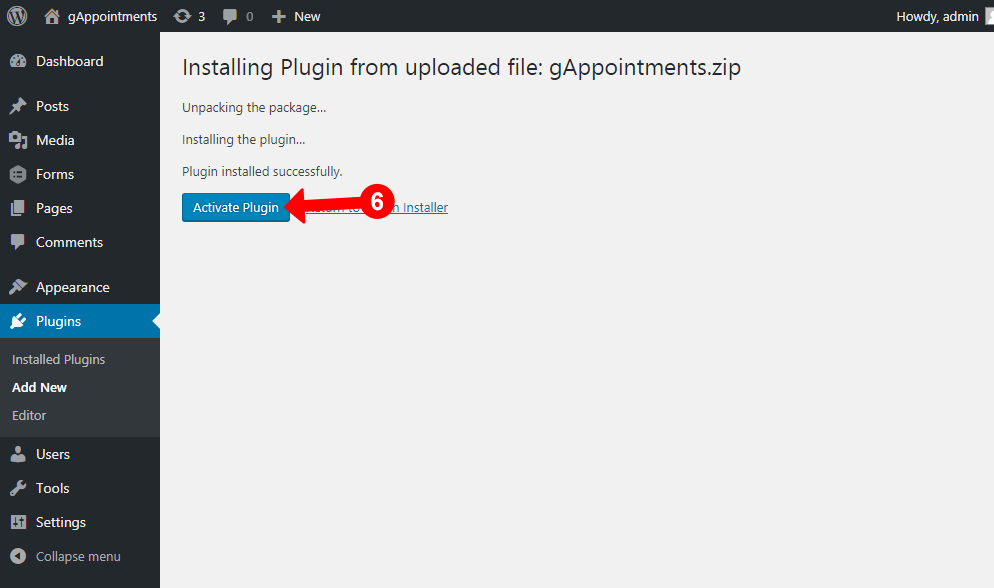
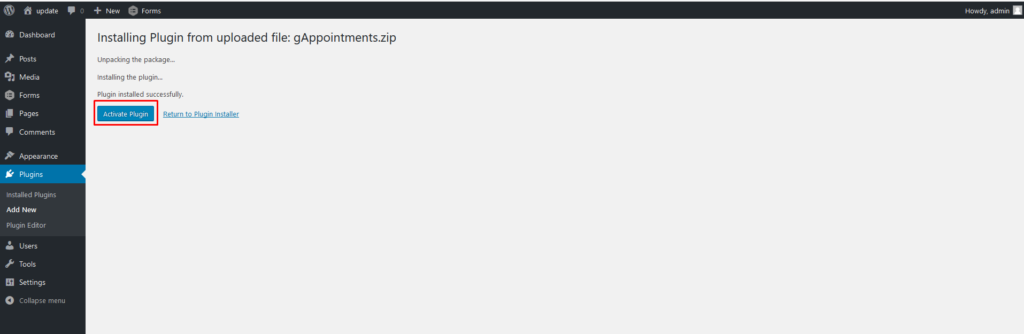
Step 5. After installed successfully, click “Activate” to make the gAppointments active
Always remember to download the latest version from your Themeforest account.
Step 1. Log into your WordPress Admin area.
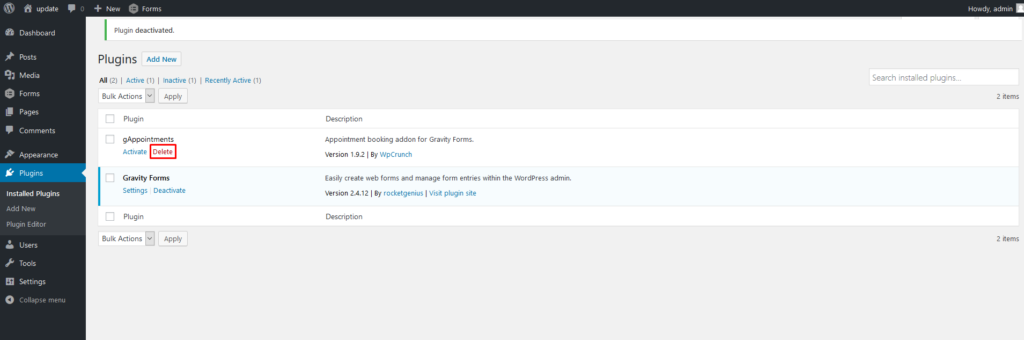
Step 2. Disable and remove the old version of the plugin.
Step 3. Click on the button “Add new”.
Step 3. In the “Add new” page, click “Upload Plugin” on top
Step 4. In the “Upload” page, click “Choose file” to browse for the theme installation file in [path-to-your-downloaded-package] /gAppointments.zip). Click “Install Now”. (You might need to extract the codecanyon package first)
Step 5. After installed successfully, click “Activate” to make the gAppointments active
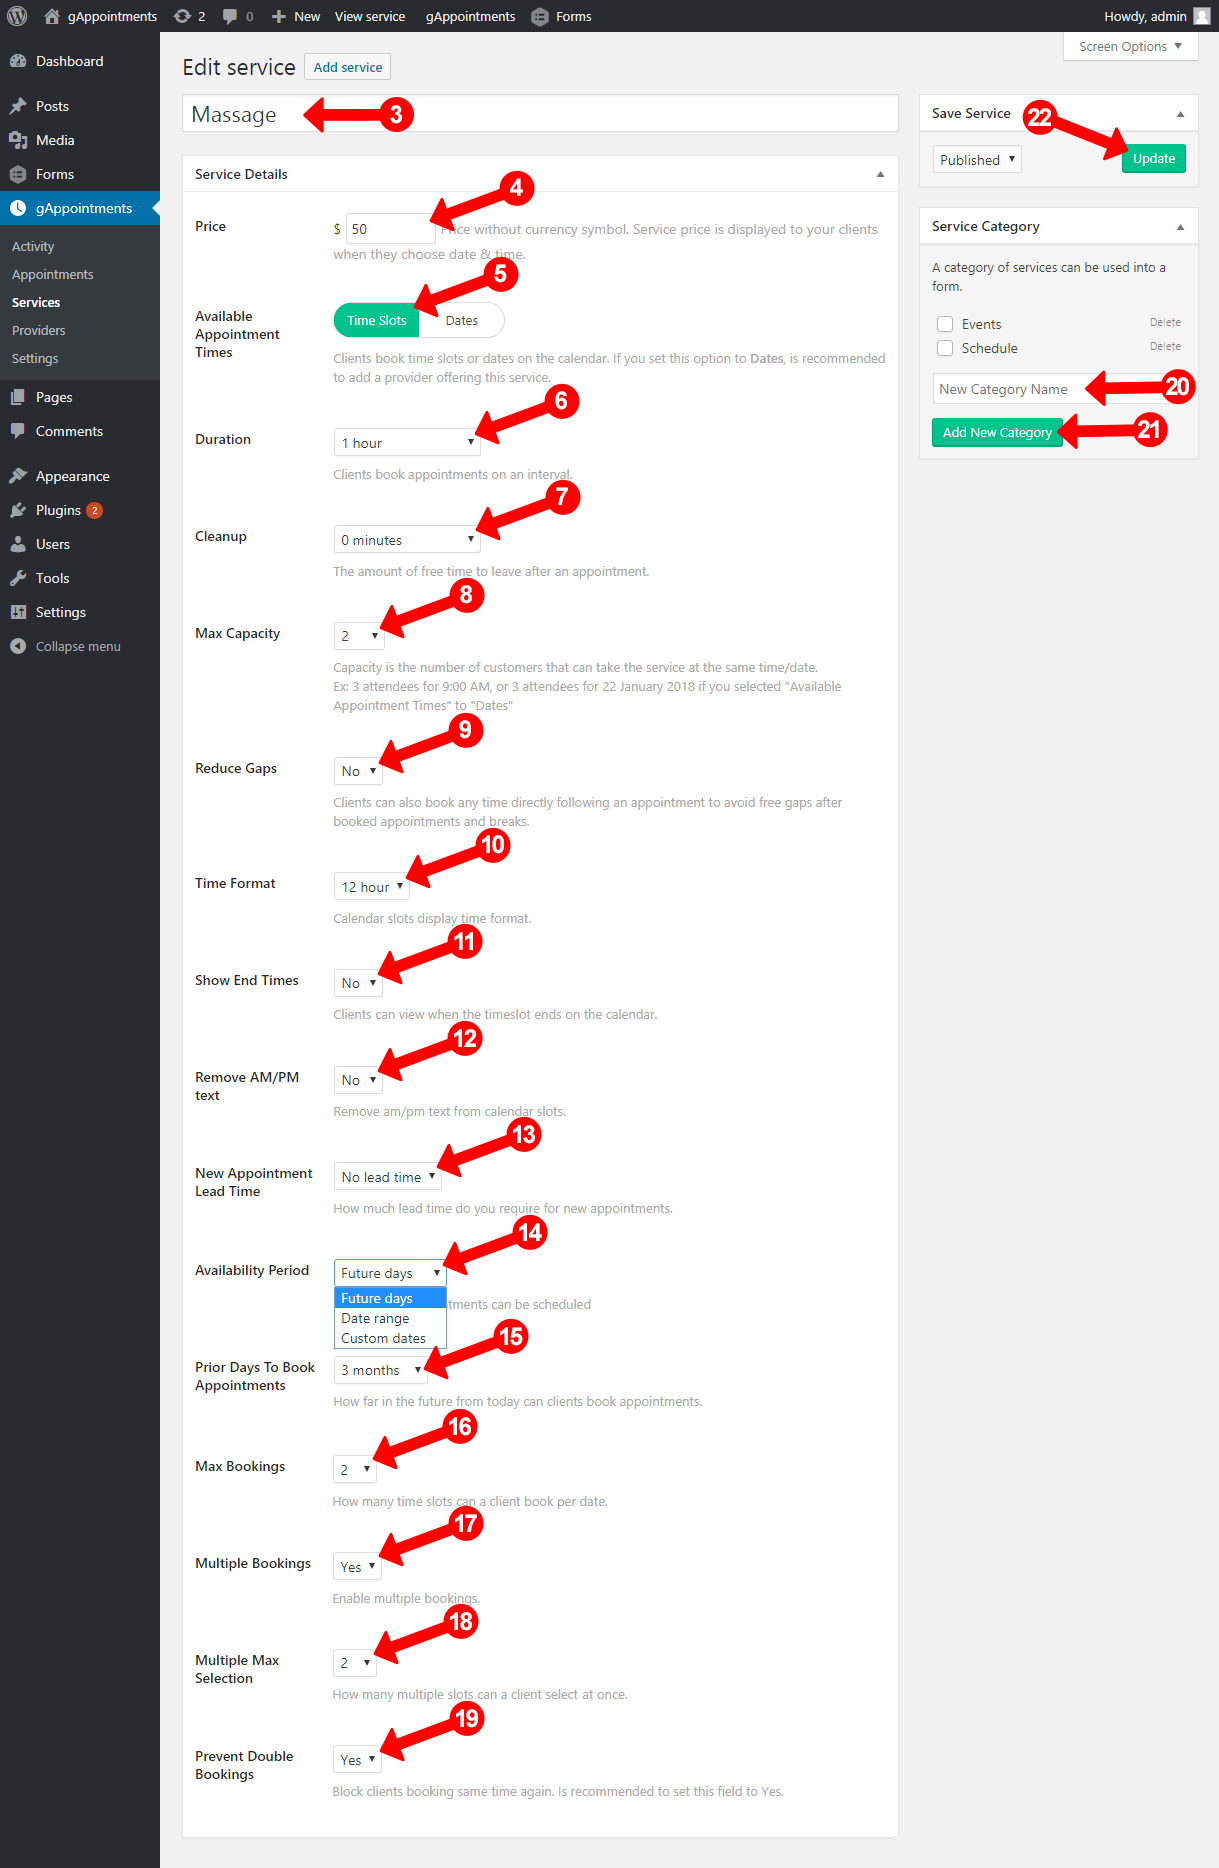
Note: If you set this option to Dates, is recommended to add a provider offering this service.
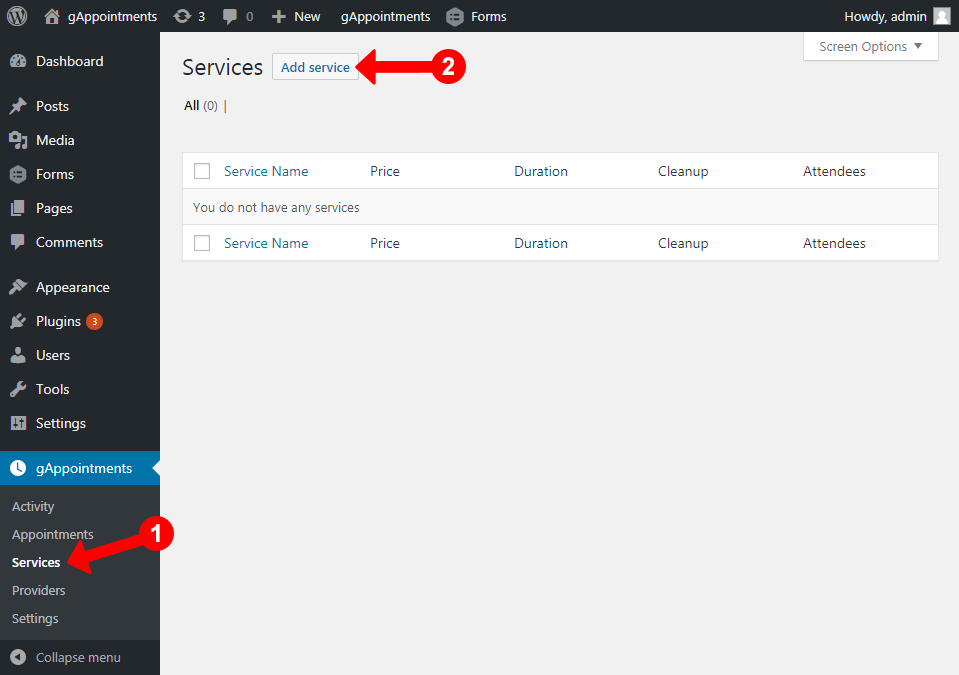
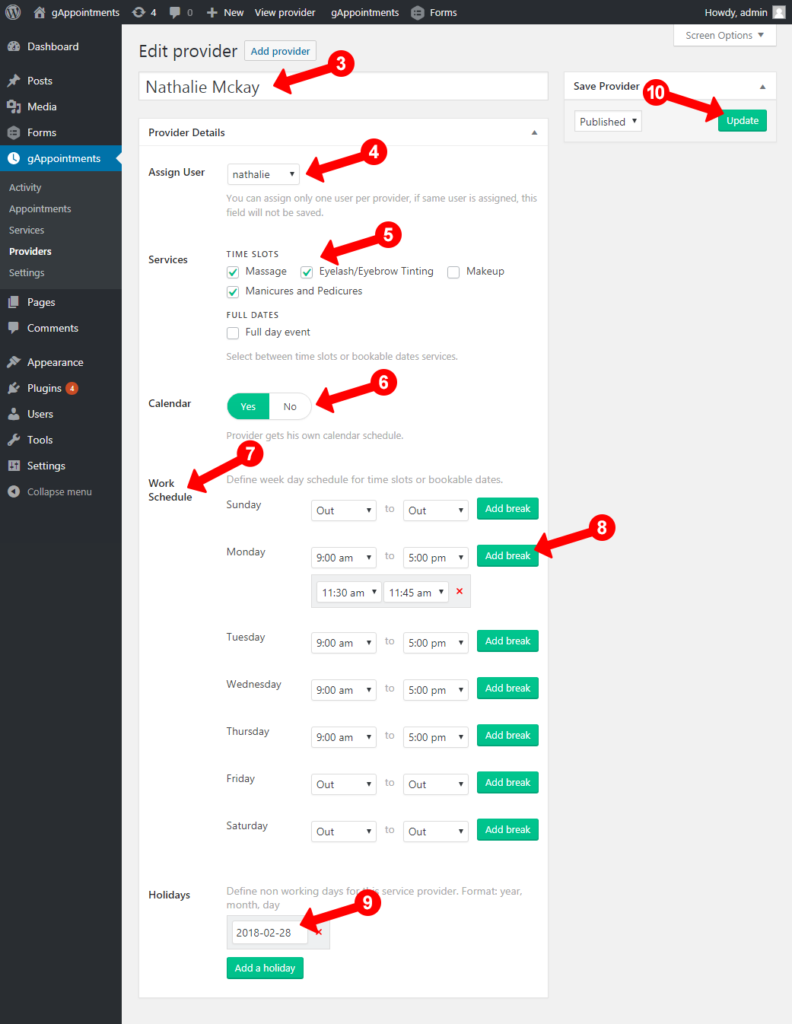
Step 1. gAppointments > Providers
Step 2. Click Add provider on top left admin

Step 3. Add provider name
Step 4. Assign User – You can assign only one registered user per provider, if same user is assigned, this field will not be saved.
Step 5. Services – Select which services provider supports
Step 6. Calendar – If you set this as NO, the default work hours, breaks, and non working days will be used from gAppointments > Settings > Calendar. Follow next steps if you set this as YES
Step 7. Work schedule – Define week day schedule for time slots or bookable dates. If you are using for bookable dates, put any times, just don’t select “Out”
Step 8. Add Breaks – Set breaks for every day of the week. (Optional)
Step 9. Holidays – Set non working days. (Optional)
Step 10. Save provider as Published
For sync pairing instructions, please contact us privately, we do not show instructions publicly.
Make sure you already installed and activated GravityForms.
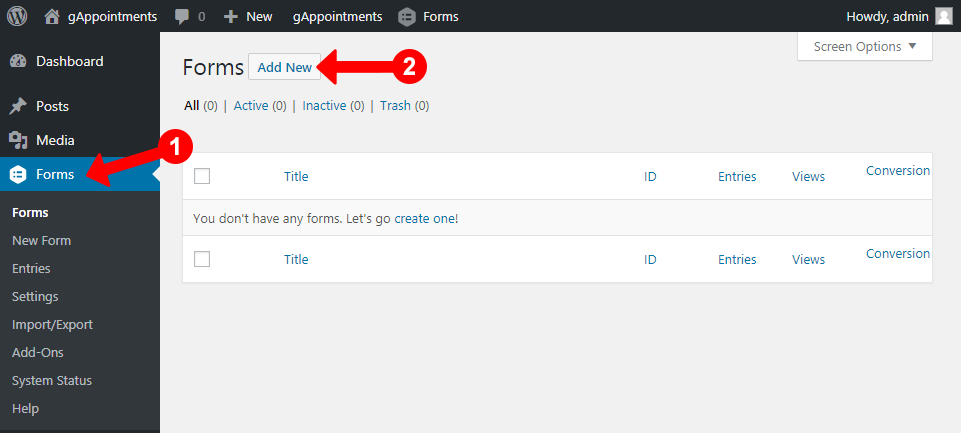
Step 1. Go to Forms
Step 2. Click Add new on top left admin
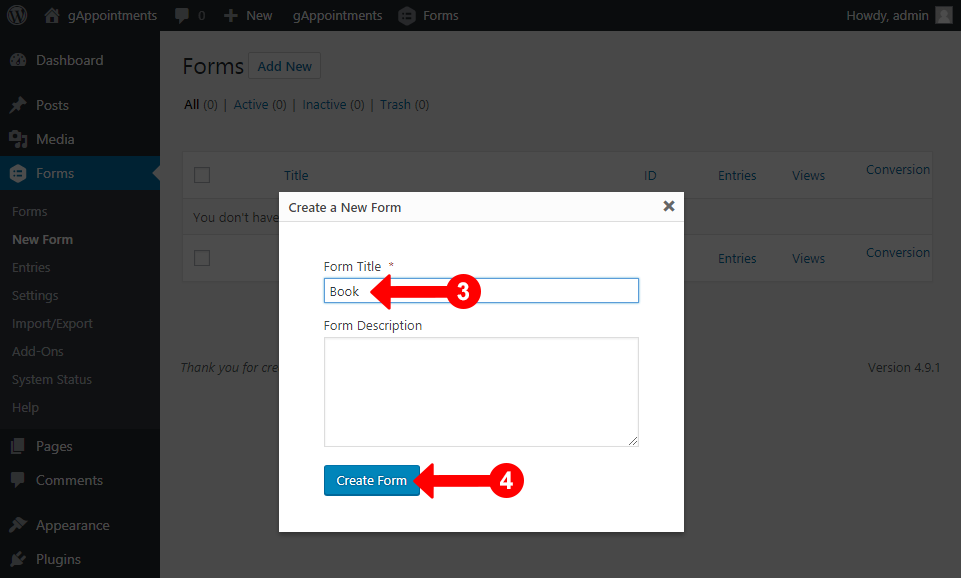
Step 3. Add form title, i called it Book
Step 4. Click on “Create Form” button
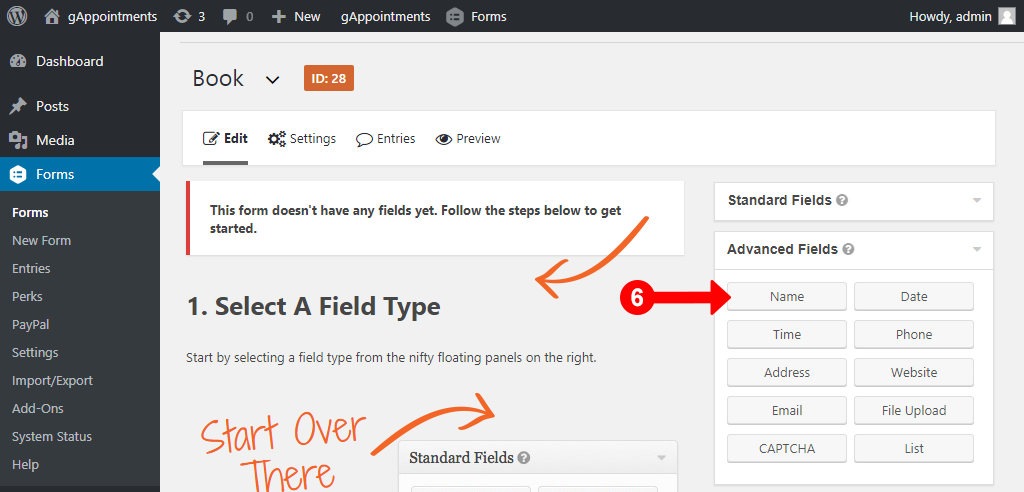
Step 5. Click on “Advanced Fields” tab
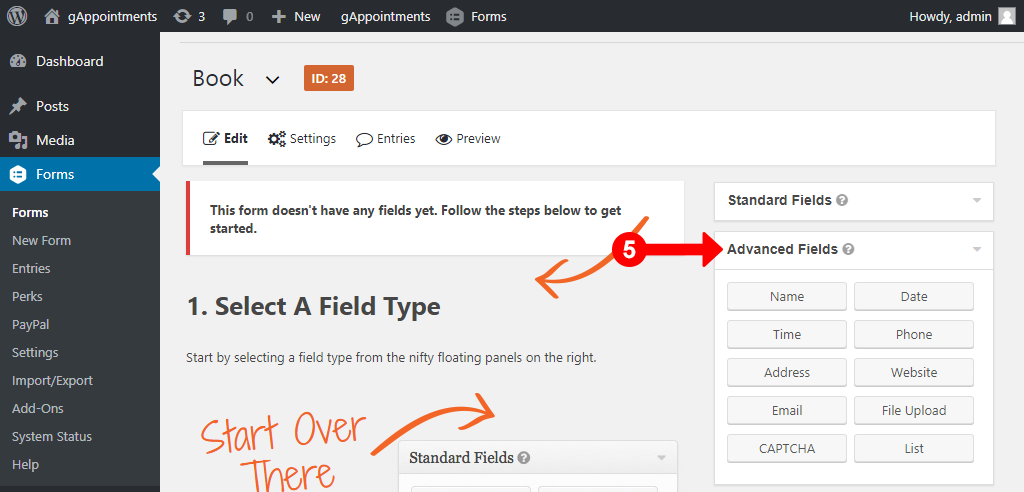
Step 6. Drag “Name” Widget to the left. (This field is optional)
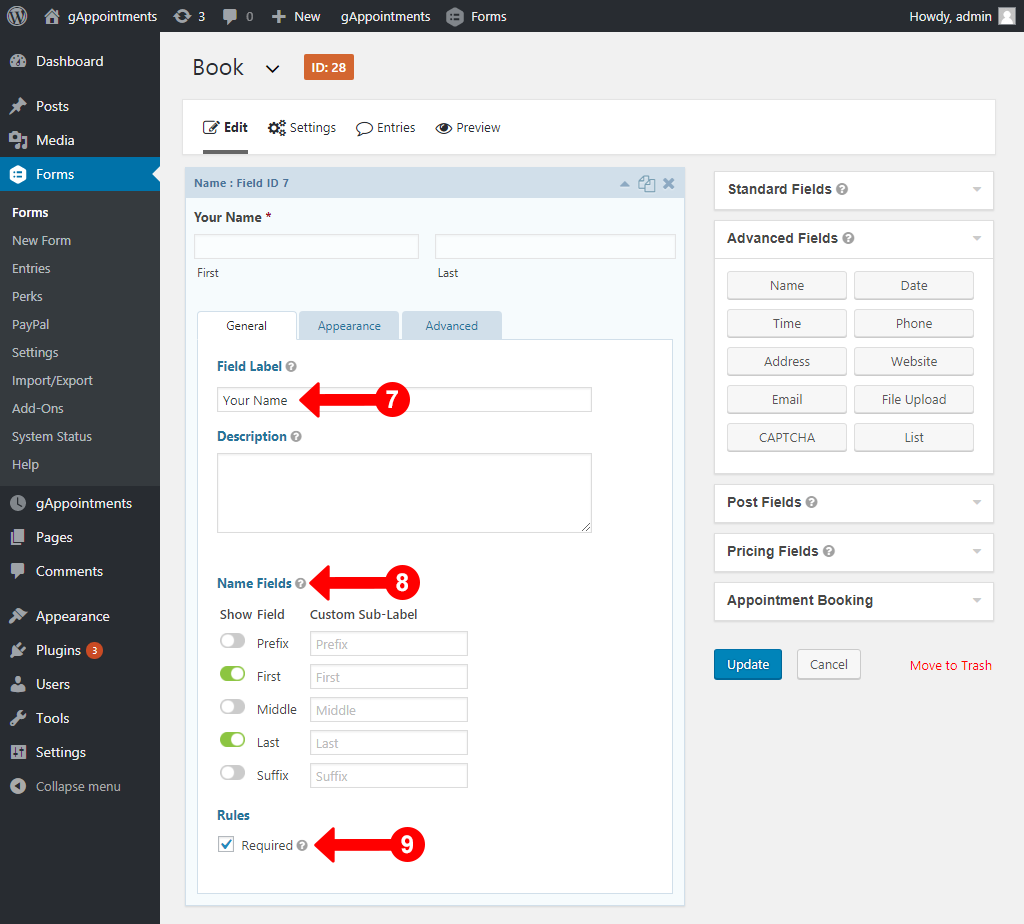
Step 7. Give Field Label a name
Step 8. On Name Fields you can select any field you want to show. At least one field needs to be selected.
Step 9. Set widget as required
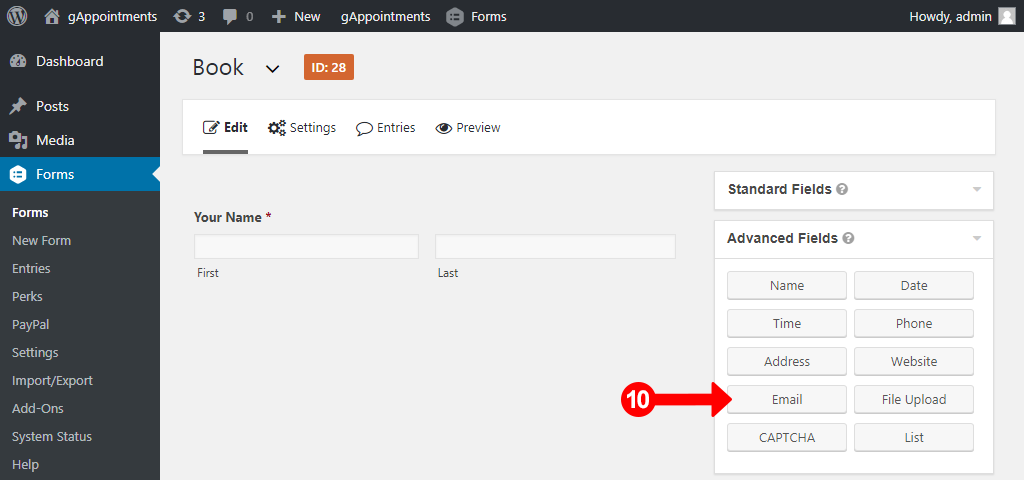
Step 10. Drag “Email” Widget to the left. (This field is optional)
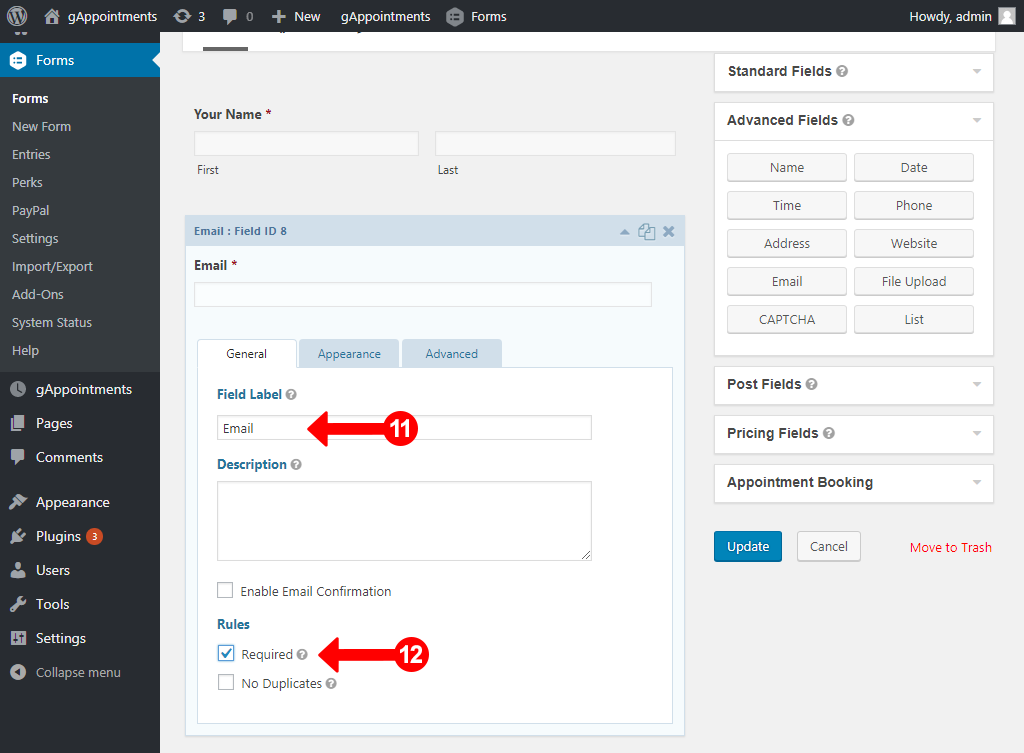
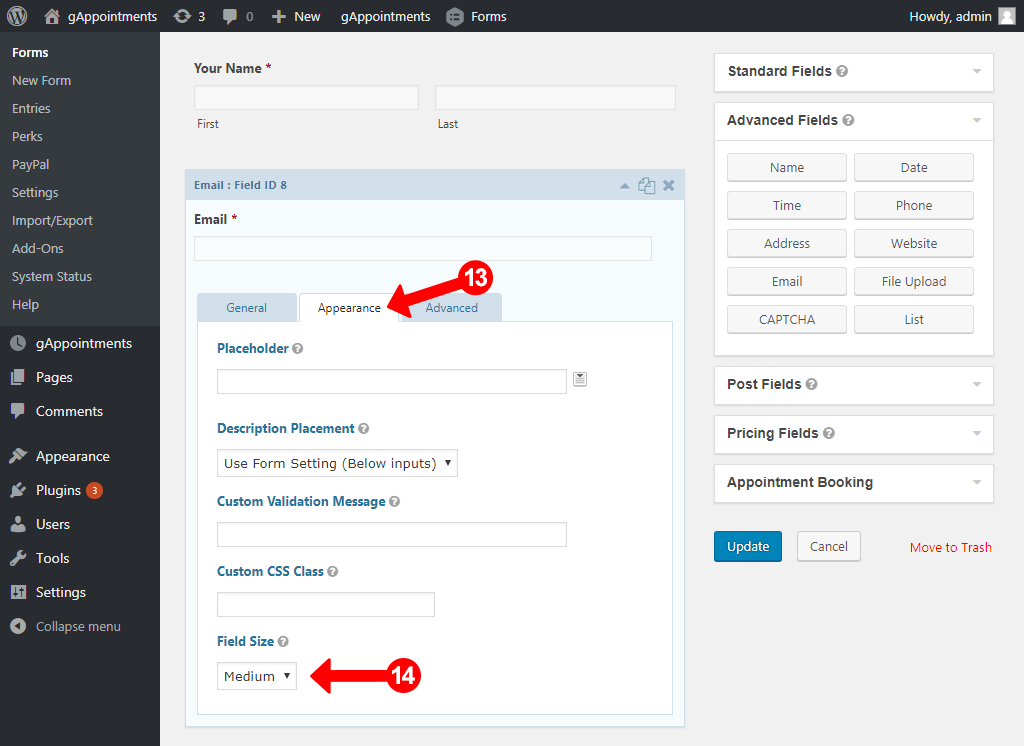
Step 11. Give Field Label a name
Step 12. Set widget as required
Step 13. Click on widget Appereance Tab
Step 14. Select any Field Size Width
Step 15. Drag “Phone” Widget to the left and repeat step 11, step 12, step 13, step 14. (This field is optional)
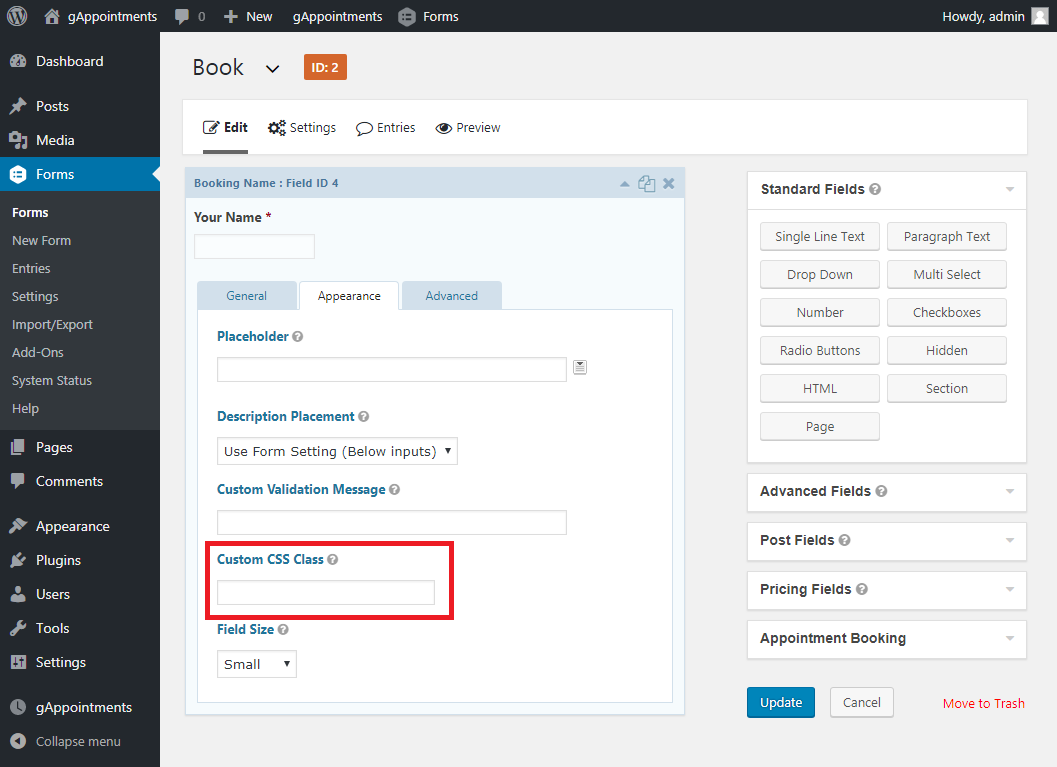
NOTE: If your form is using multiple advanced fields of the same type (Multiple name fields, multiple email fields, multiple phone fields) You will need to specify which field should being used to fill out user data for appointment. You can do that by adding a custom css class ga-field in “Custom CSS Class” field.
Step 16. Click on “Appointment Booking” tab
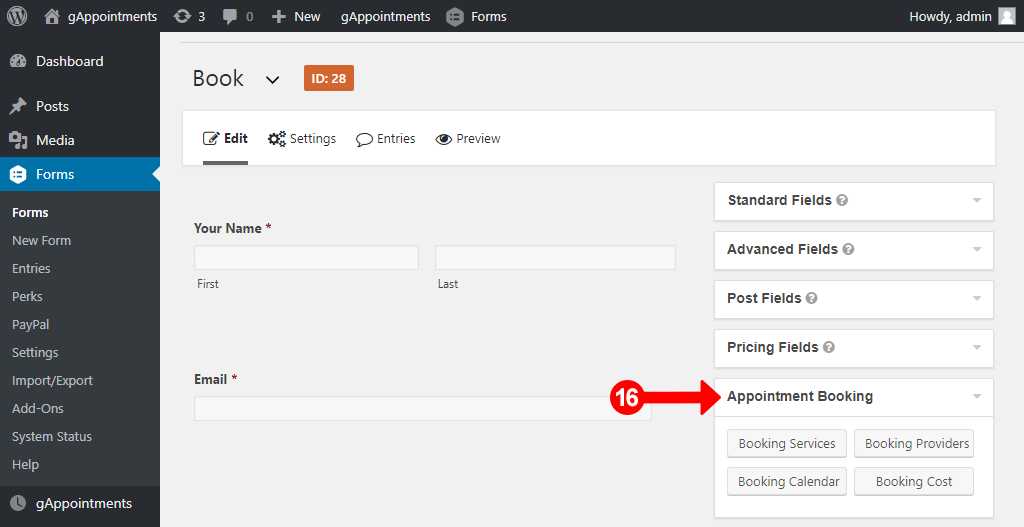
Step 17. Drag “Booking Services” Widget to the left.

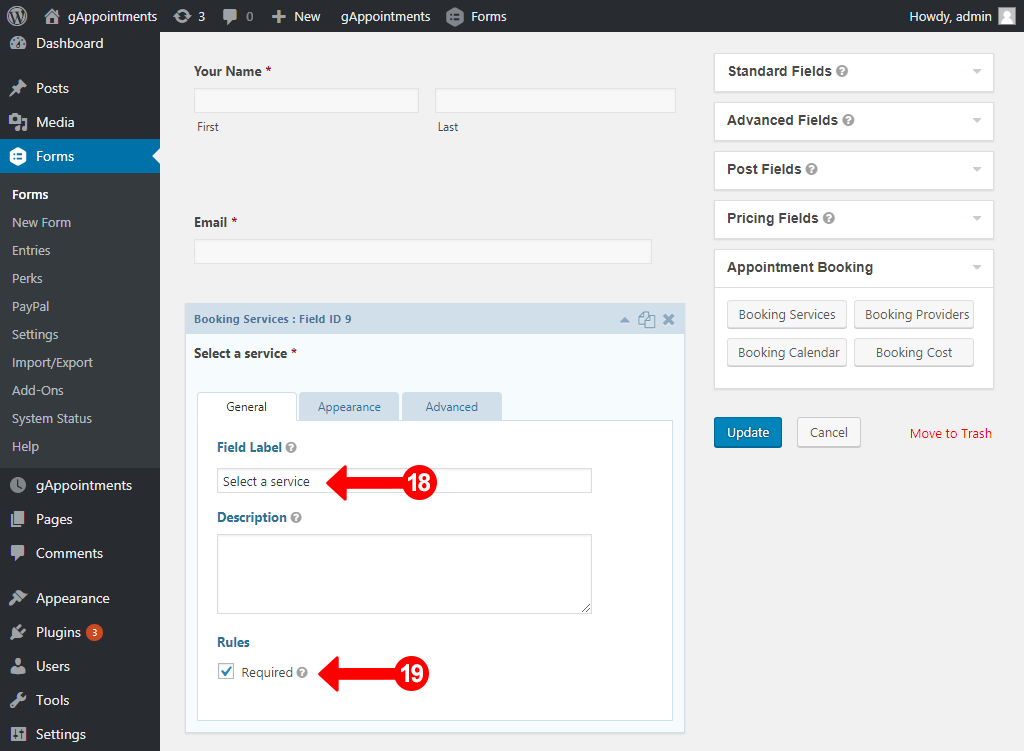
Step 18. Give Field Label a name
Step 19. Set widget as required
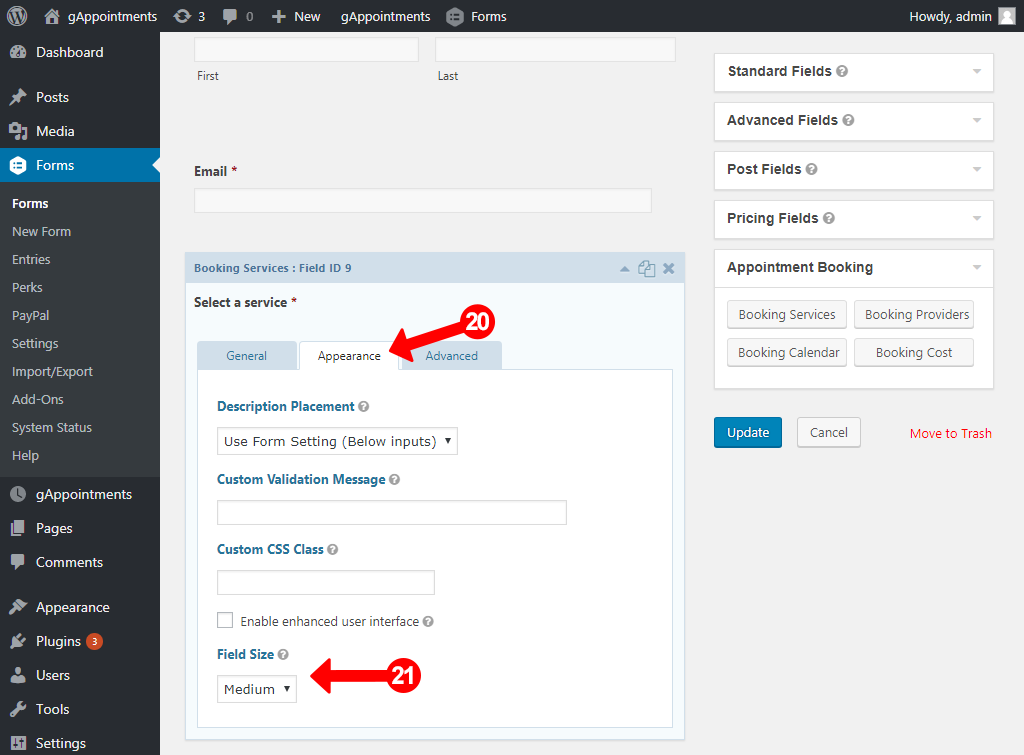
Step 20. Click on widget Appereance Tab
Step 21. Select any Field Size Width
Step 22. Drag “Booking Providers” Widget to the left and repeat step 18, step 19, step 20, step 21. (This field is optional)
Step 23. Drag “Booking Calendar” Widget to the left and repeat step 18, step 19, step 20, step 21.
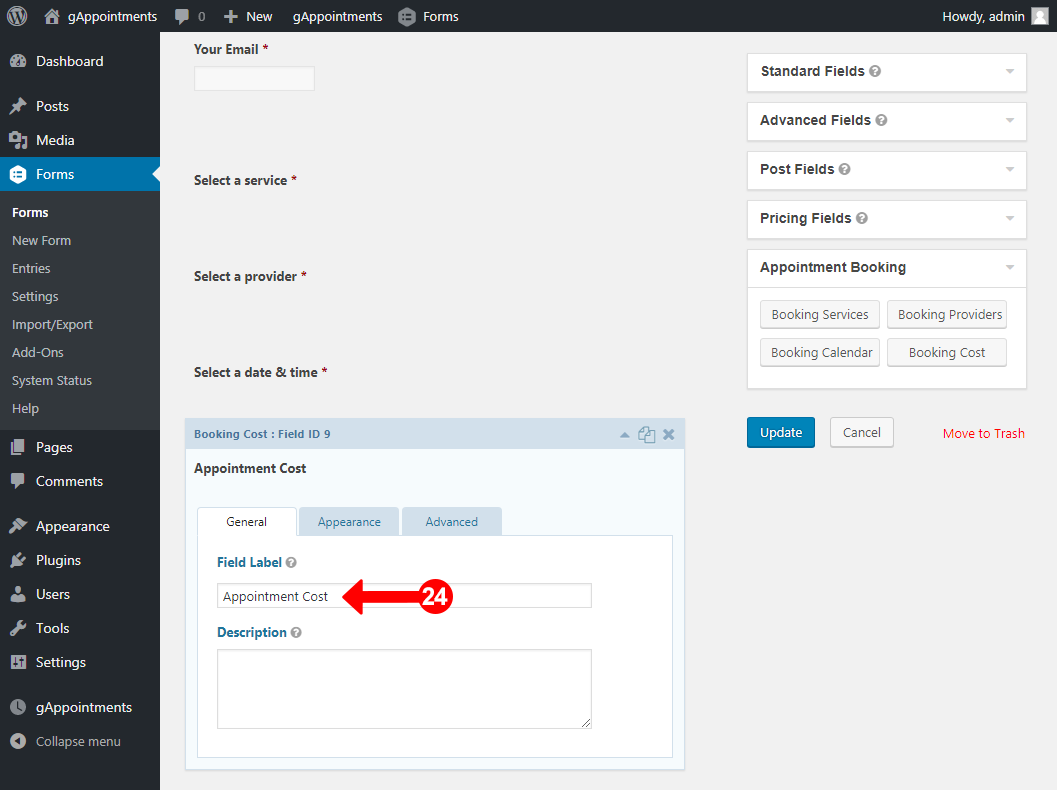
Step 24. Drag “Booking Cost” Widget to the left and give Field Label a name. (This field is optional)
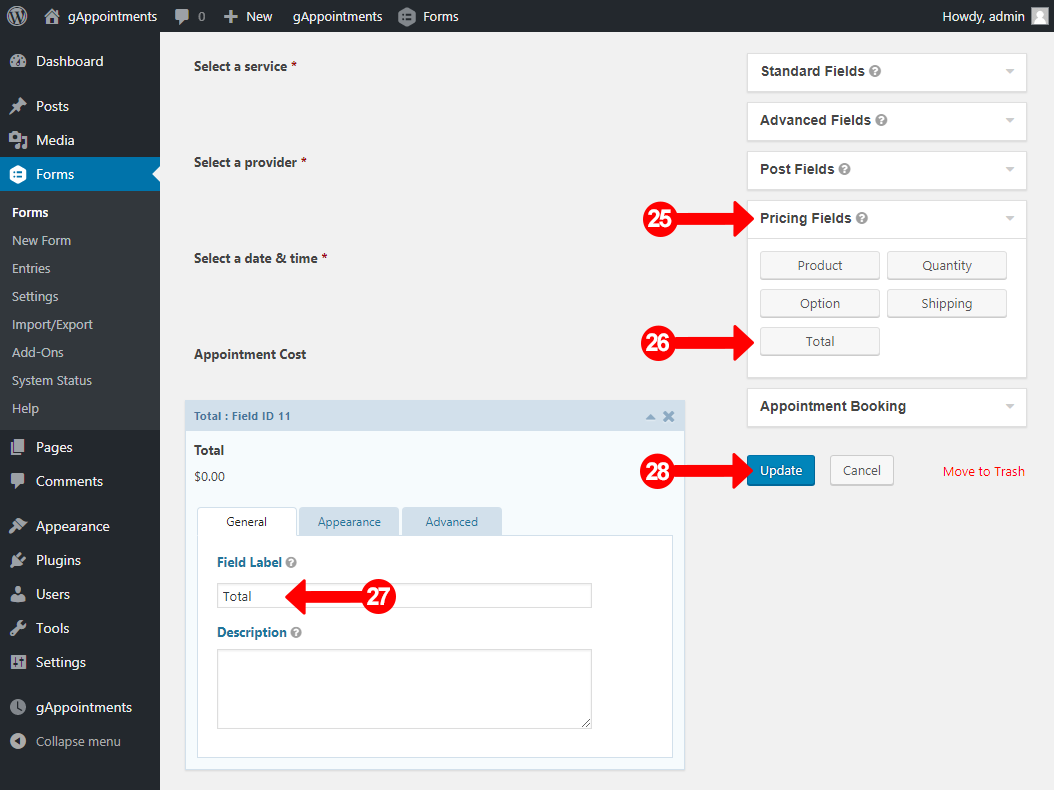
Step 25. Click on “Pricing Fields” Tab.
Step 26. Drag “Total” Widget to the left.
Step 27. Give Field Label a name.
Step 28. Update Form.
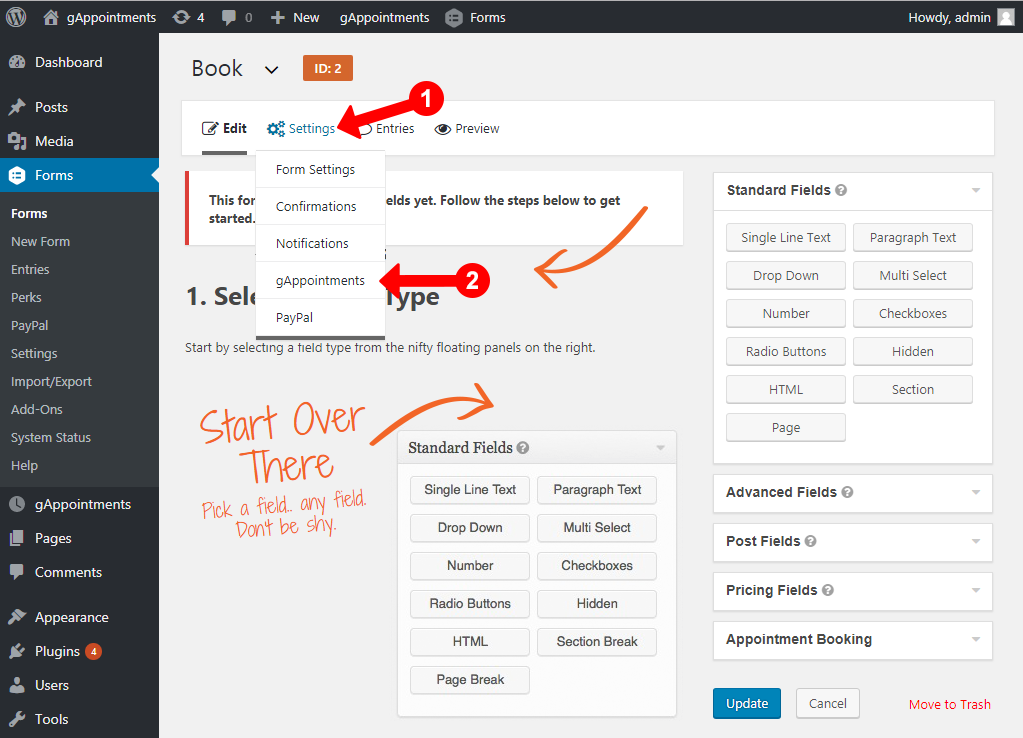
Step 1. Hover over Settings
Step 2. Click on gAppointments
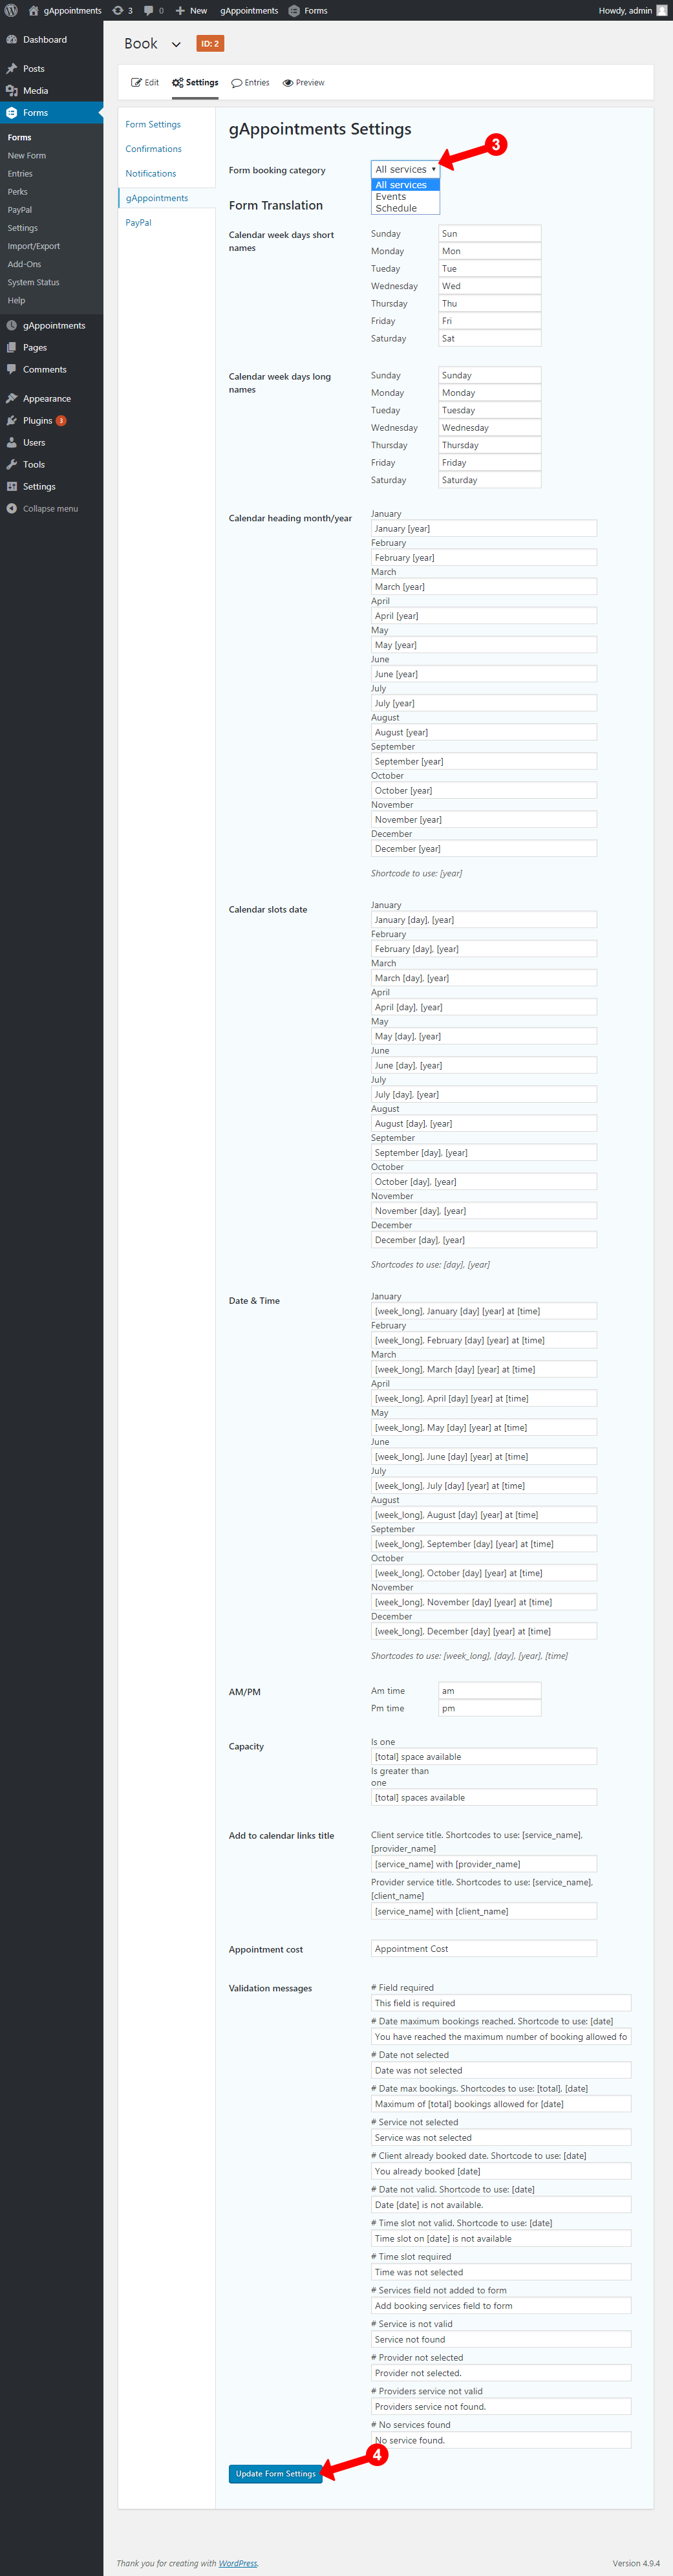
Step 3. Select a category of services for form, or you can leave it to All services
Step 4. Click on “Update form settings” button
!IMPORTANT: If you don’t want clients to pay for appointments, simply remove “Booking Cost”, “Total” widgets, and don’t setup the paypal feed.
If you have installed and activated Gravity Forms PayPal Standard Add-On follow these steps:
Step 1. Hover over Settings
Step 2. Click on Paypal
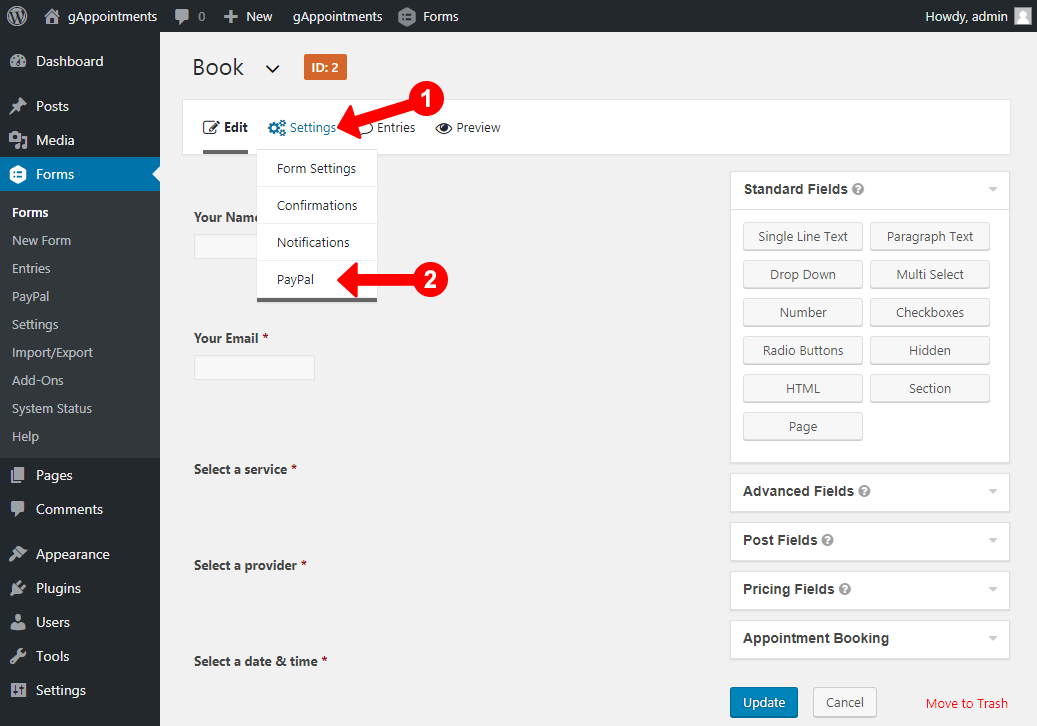
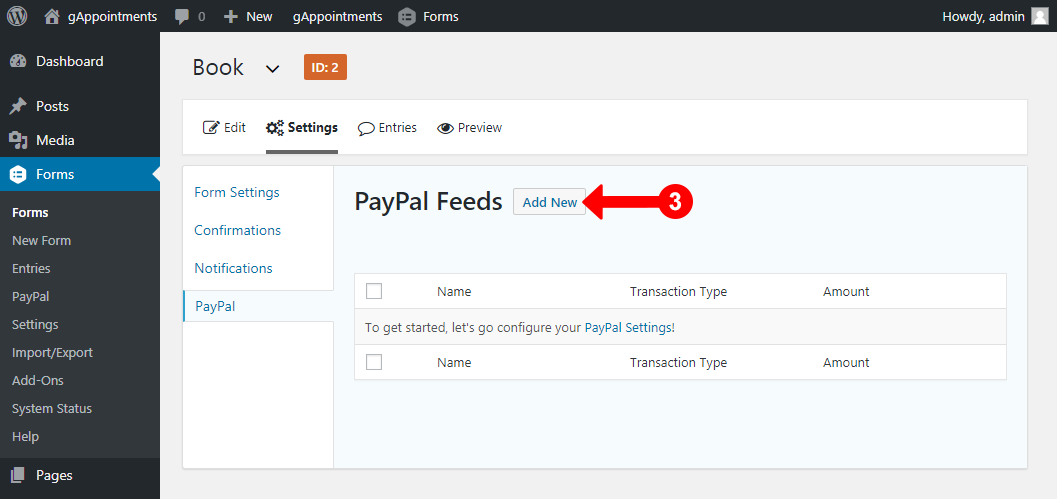
Step 3. Click Add new to add new paypal feed
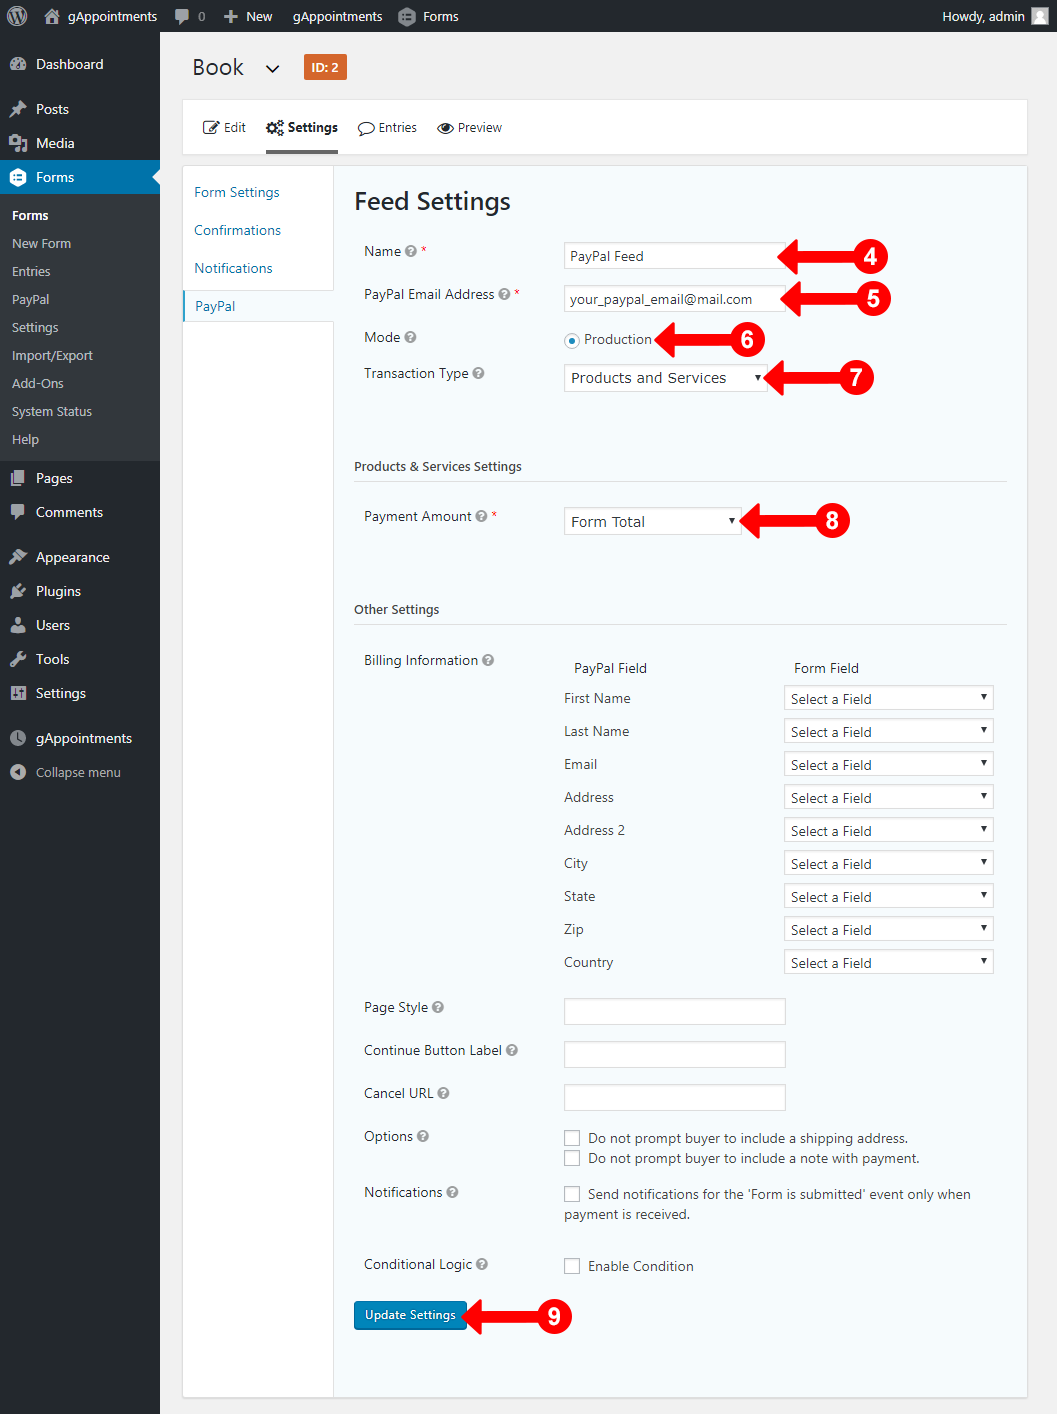
Step 4. Set feed name
Step 5. Set your paypal email
Step 6. Set Mode to Production
Step 7. Set Transaction Type to Products and Services
Step 8. Set Payment Amount to Form Total
Step 9. Click on “Update Settings” button
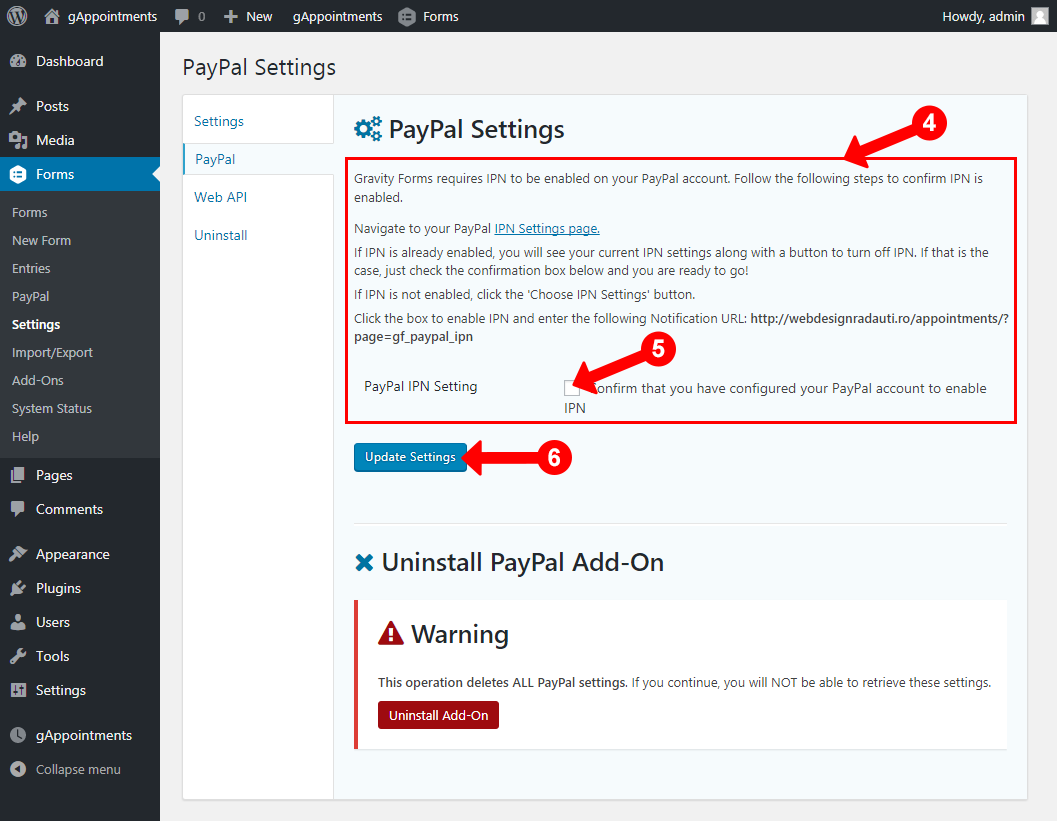
Step 1. Go to Forms
Step 2. Go to Settings
Step 3. Click on “PayPal” tab
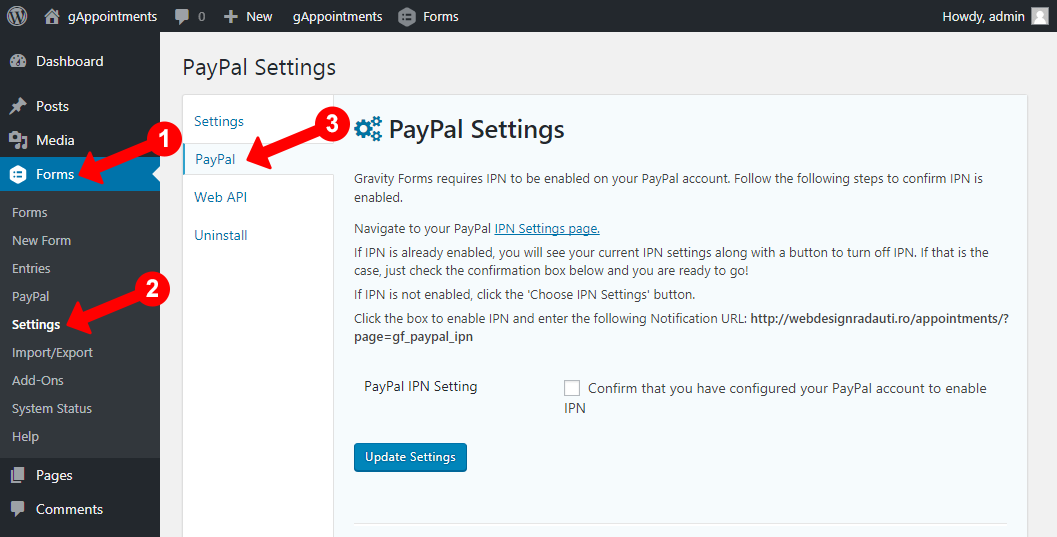
Step 4. Read and follow the steps to confirm IPN is enabled.
Step 5. Check “Confirm that you have configured your PayPal account to enable IPN”
Step 6. Click on “Update Settings” button
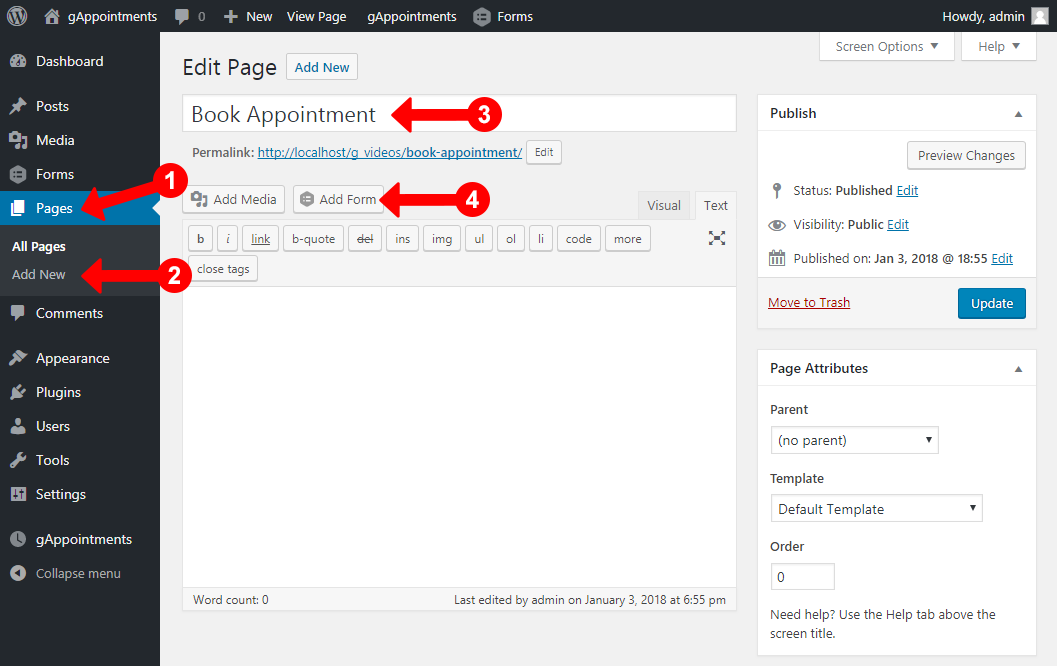
Step 1. Go to Pages
Step 2. Go to Add new
Step 3. Add a page title
Step 4. Click on “Add form” button over the top of content area
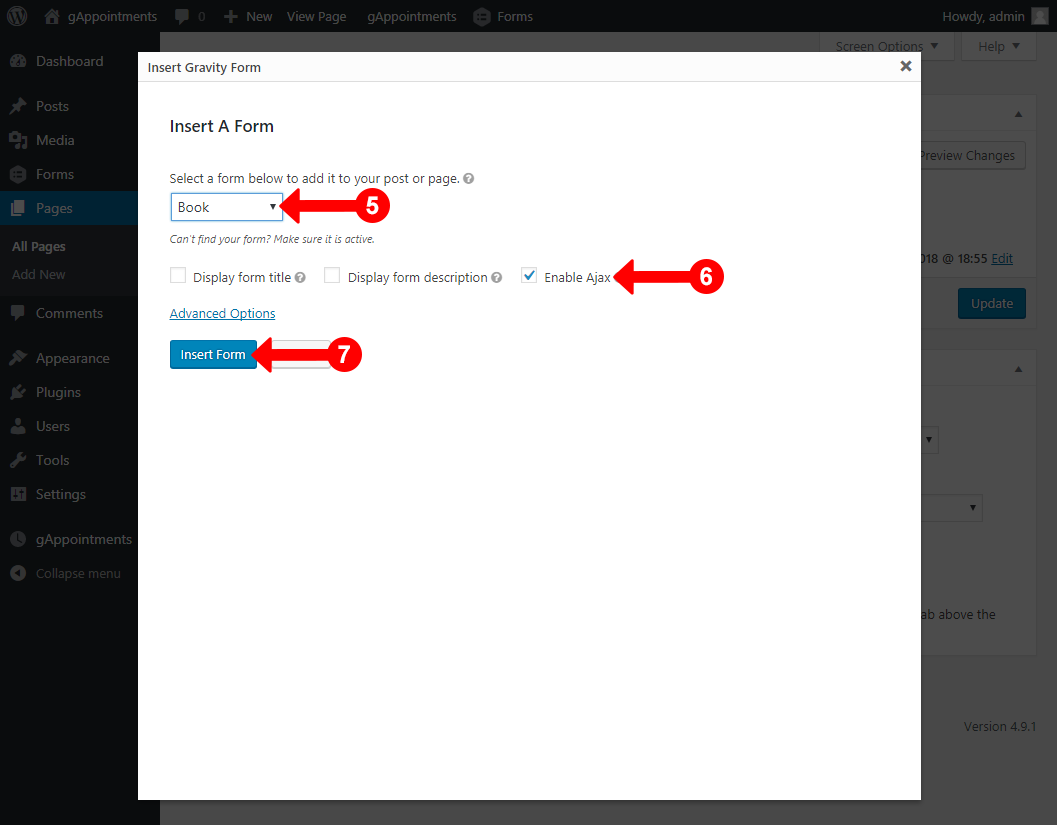
Step 5. Select a form
Step 6. Check “Enable Ajax”
Step 7. Click on “Insert Form” button
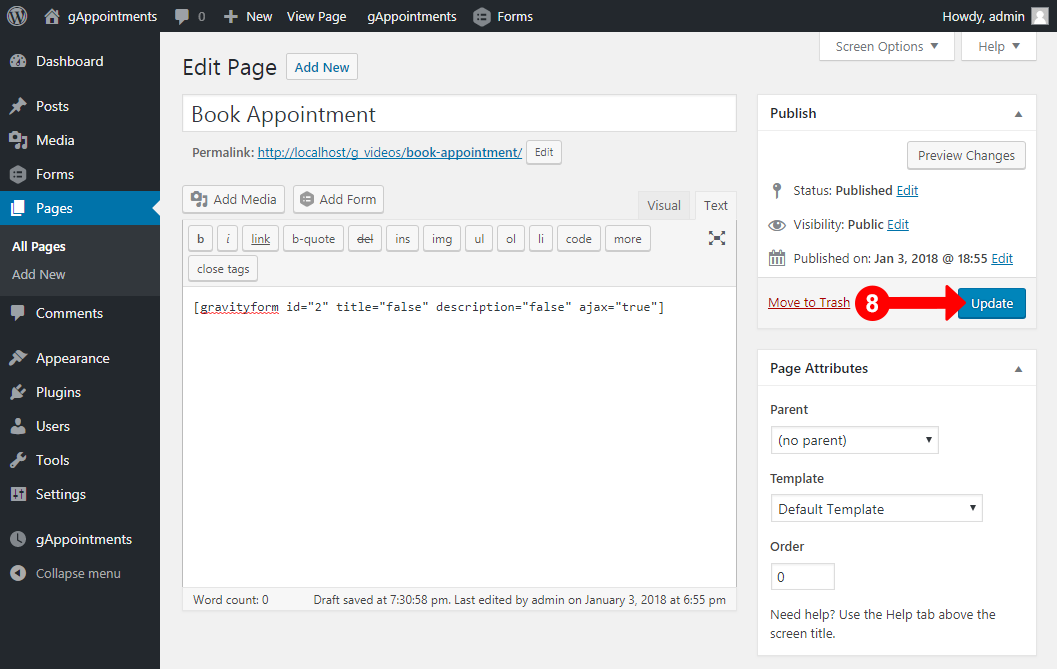
Step 8. Click on “Update” button
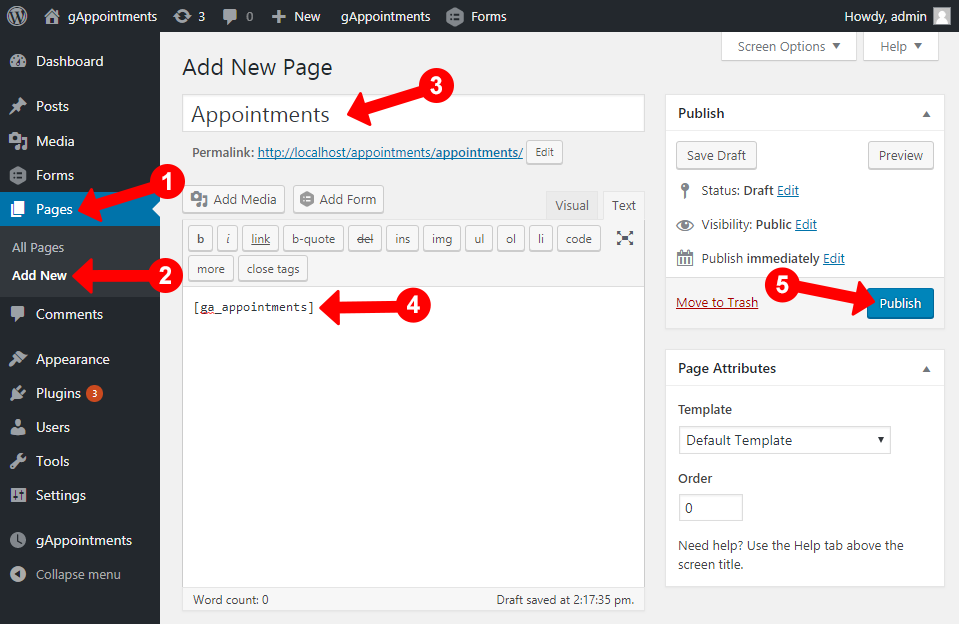
Add shortcode for clients/providers to manage they’re appointments:
Step 1. Go to Pages
Step 2. Go to Add new
Step 3. Add a page title
Step 4. In the content area add shortcode to display client appointments: [ga_appointments] or to display provider appointments: [ga_provider_appointments]
Step 5. Publish page
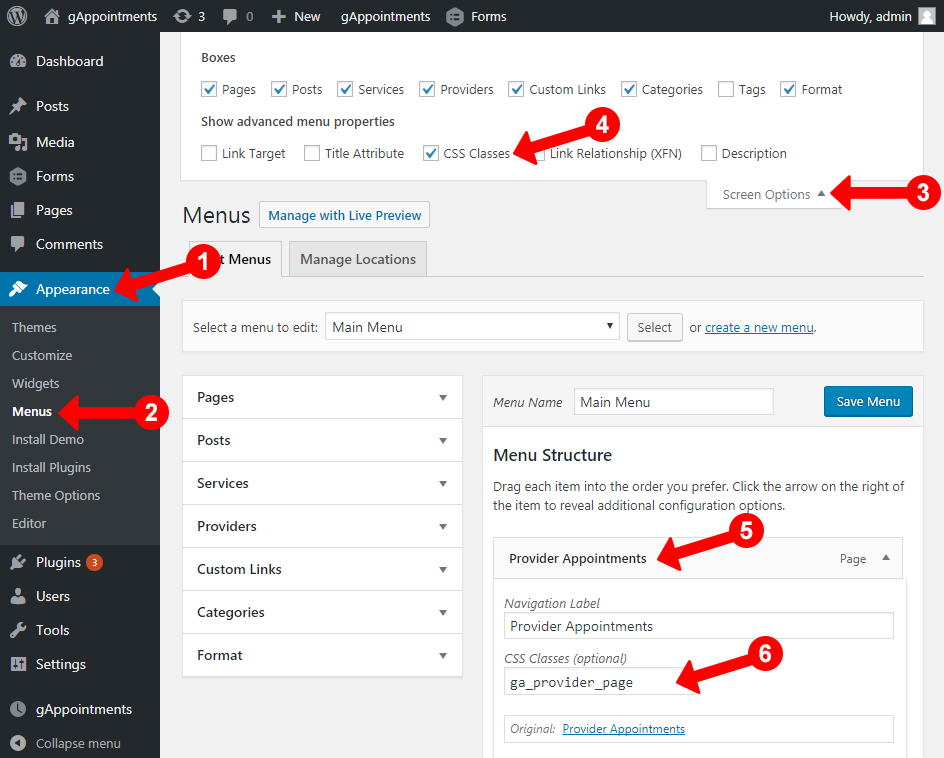
Show appointments pages in the navigation only for clients/providers:
Step 1. Go to Appearance
Step 2. Go to Menus
Step 3. Click Screen Options on top right admin
Step 4. Check CSS Classes to enable menu item CSS Classes
Step 5. Find the clients/providers page you added in the navigation
Step 6. Add class “ga_customer_page” or “ga_provider_page”
The way it works, if a user is logged and is a client or a provider those pages will be visible only to them in the navigation.
Shortcodes have options for pagination, pagelen option defines how many appointments will be displayed per one page. default length is 8 appointments

gAppointments comes with a lot of options to help you customize the plugin. Go to gAppointments > Settings to configure.
Define working hours, breaks and non working days if a service doesn’t have any providers. Here you can also set the schedule for bookable dates.
Appointment notifications are sent to the client/service provider when an appointment is pending, scheduled or cancelled.
OPTIONS
Available shortcodes to use in the email, some of them are not available depending on the email template:
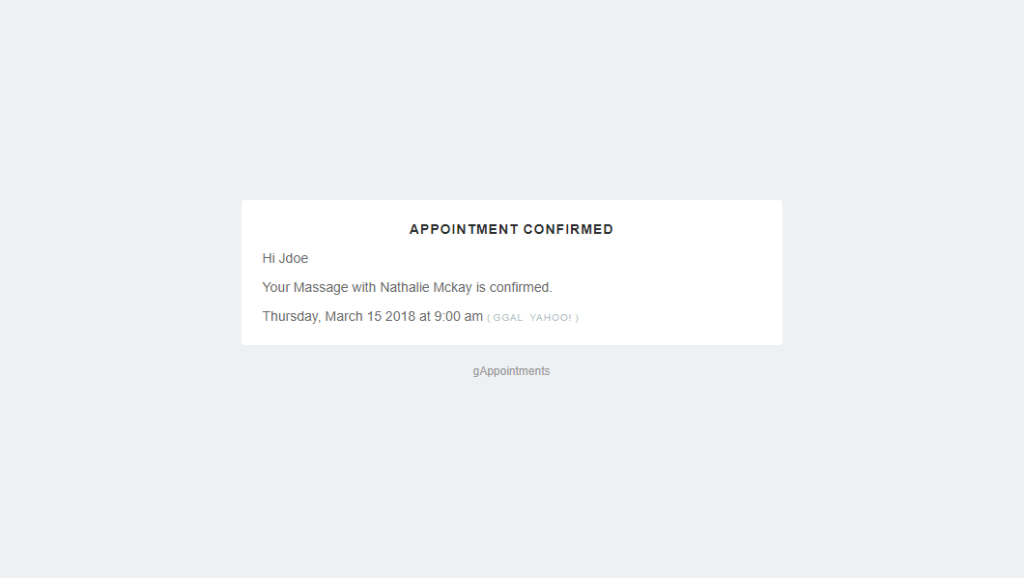
Here is an email example.
OVERRIDING EMAIL TEMPLATE
You can override appointment email template by doing the following:

Sms notifications can be sent out with Twillio to client or service provider when an appointment is pending, confirmed or cancelled.
For gAppointments to send SMS Notifications with Twillio, install WP Twilio Core free plugin.
OPTIONS
Available shortcodes to use in sms notifications, some of them are not available depending on the notification template:
1. Create a Google Cloud Project:
2. Enable the Calendar API:
3. Create API Credentials:
4. Authenticate gAppointments:
After successful authorization, you should also see your Calendar ID.
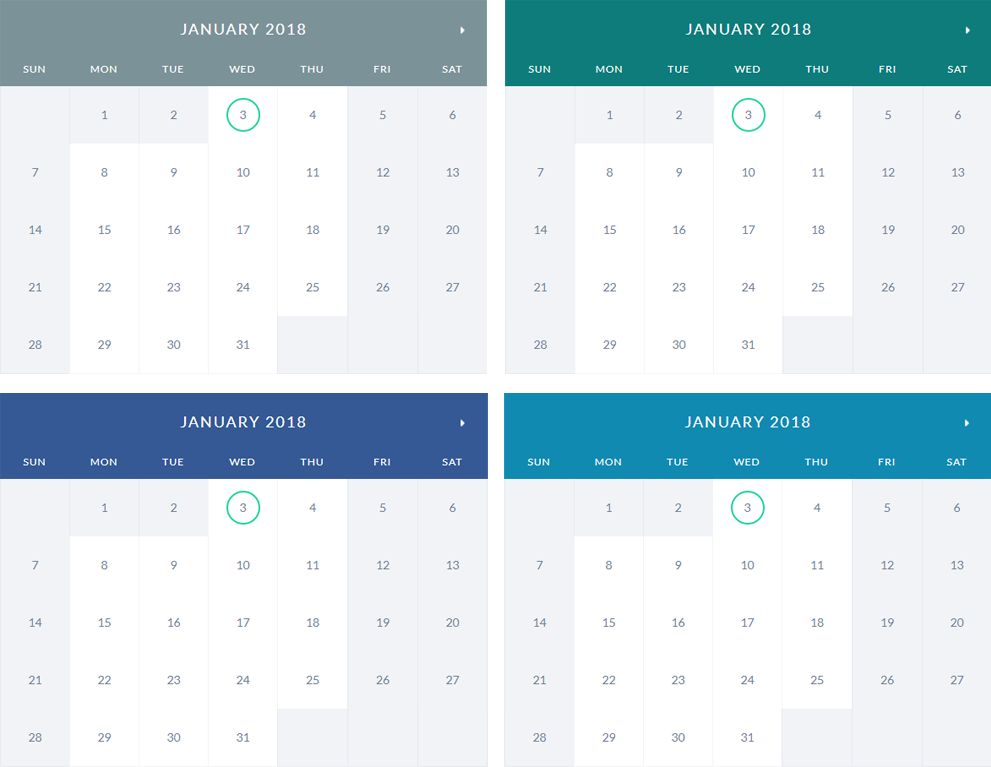
Here you can change the colors of the calendar.

Translate calendar into your language. You can also translate every form individually by going to a form, Settings > gAppointments
Use the shortcodes in any page you wish.
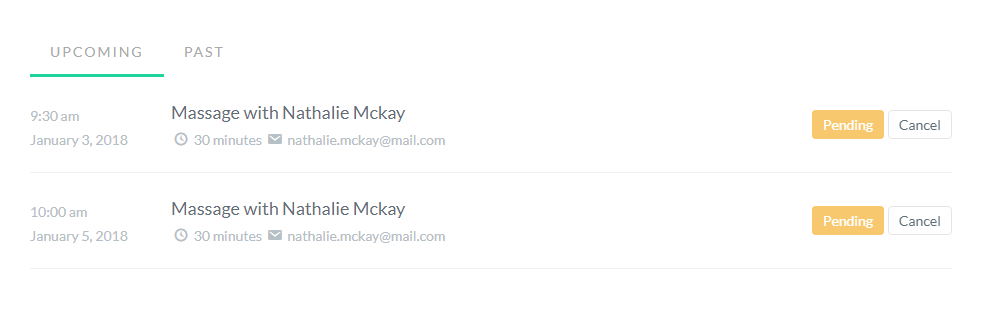
Customer appointments shortcode: [ga_appointments]
Clients can cancel appointments if you set Cancellation Policy as Yes on gAppointments > Settings > Policies, example shortcode display below:
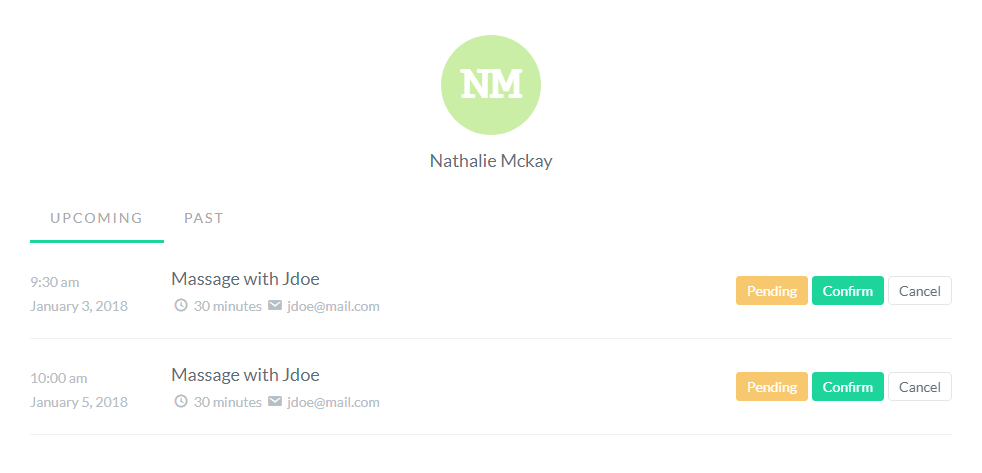
Provider appointments shortcode: [ga_provider_appointments]
Providers can confirm/cancel appointments if you set Provider Cancellation Policy as Yes on gAppointments > Settings > Policies, example shortcode display below:
Step 1. Go to any form widget, click on Appearence and set Custom Css Class:
Left column css class: ga_col_left
Right column css class: ga_col_right
Step 2. On Appearence set Field Size to Large
With the widest settings, client will do the followings on the front page:
Select a service
Select a service provider (if required)
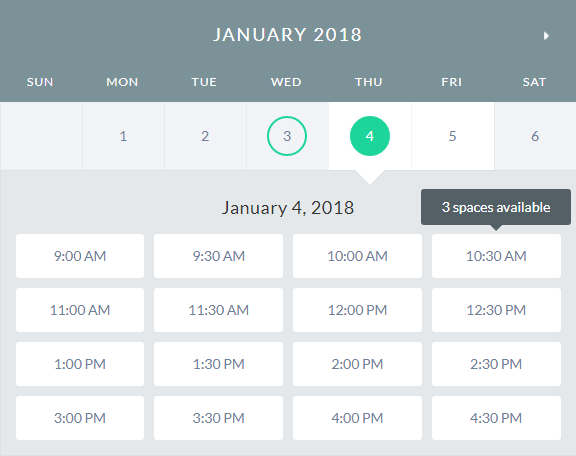
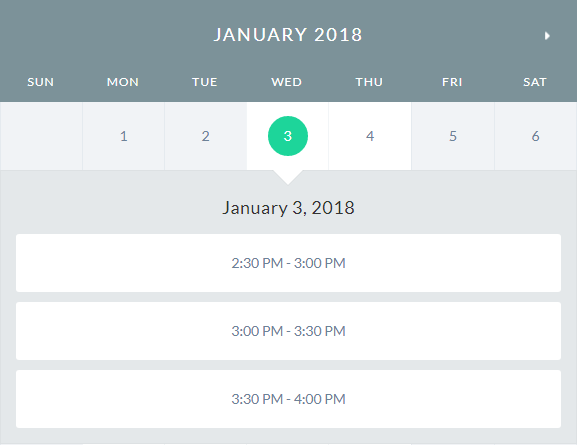
Select a free time on the calendar schedule
Enter booking name, booking email fields (if required)
Click any payment gateway payment button (if required)
Redirected to a Thank You page
Yes. gAppointments requires at least one service to be defined.
No. You may as well be working by yourself, doing your own business. Plugin will work properly without any service provider, i.e worker, defined. In this case gAppointments assumes that there is ONE service provider working, giving all the services.
If you have selected Auto Confirm field as Yes on plugin gAppointments > Settings > Policies, all appointments will be automatically confirmed, except the ones that are pending payment, those ones will be automatically confirmed after the payment was received.
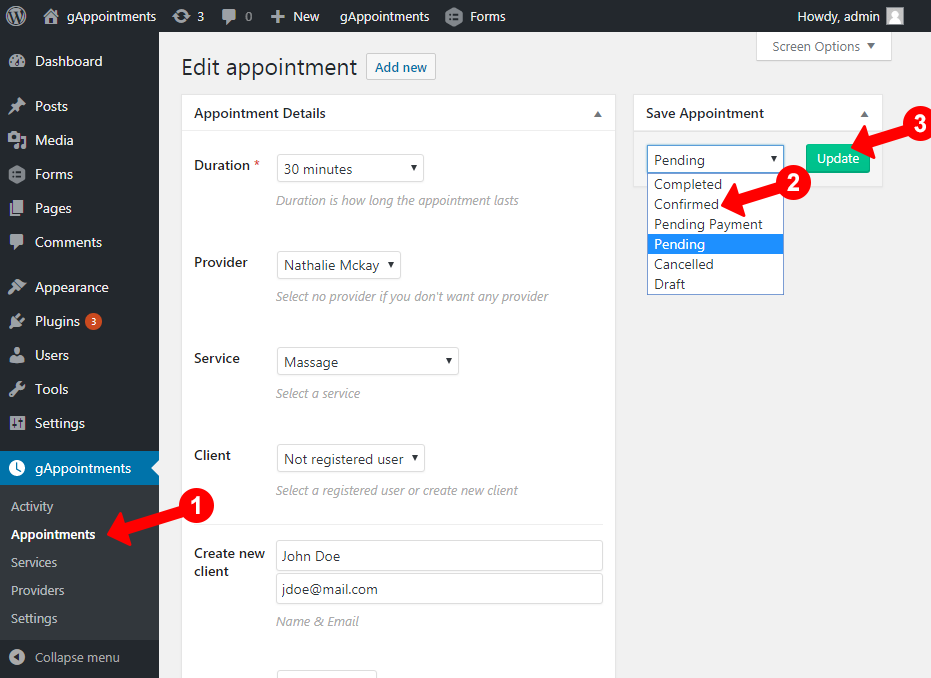
Go to gAppointments > Appointments page, find the appointment based on date and time and change the status to Confirmed.
If you added clients/provider appointments shortcode on any page and you want to show the page only to customer/provider, follow these steps:
Step 1. Go to Appearance
Step 2. Go to Menus
Step 3. Click Screen Options on top right admin
Step 4. Check CSS Classes to enable menu item CSS Classes
Step 5. Find the clients/providers page
Step 6. Add class "ga_customer_page" or "ga_provider_page"
The way it works, if a user is logged and is a client or a provider those pages will be visible only to them in the navigation.
If you don't want your schedule to be seen either, then simply do not add the shortcode in your pages.
If you face problems with the installation or customization of our product please do not hesitate to contact us via our profile page