Connecting gAppointments to Google Calendar lets your appointments sync straight into a Google account. Because the plugin needs to securely “log in” to Google on your behalf, you first create a free Google Cloud project, enable the Calendar API, and generate an OAuth Client ID and Client Secret. The five steps below walk you through the entire process from start to finish.
Step 1: Create a Google Cloud Project
- Go to the Google Cloud Console.
- Log in using the specific Google Account that owns or manages the calendar you want to sync.
- Next to the Google Cloud logo at the top left, click the project drop-down menu and choose New Project.

- Give the project a clear name (for example, gAppointments Calendar Sync) and click Create.
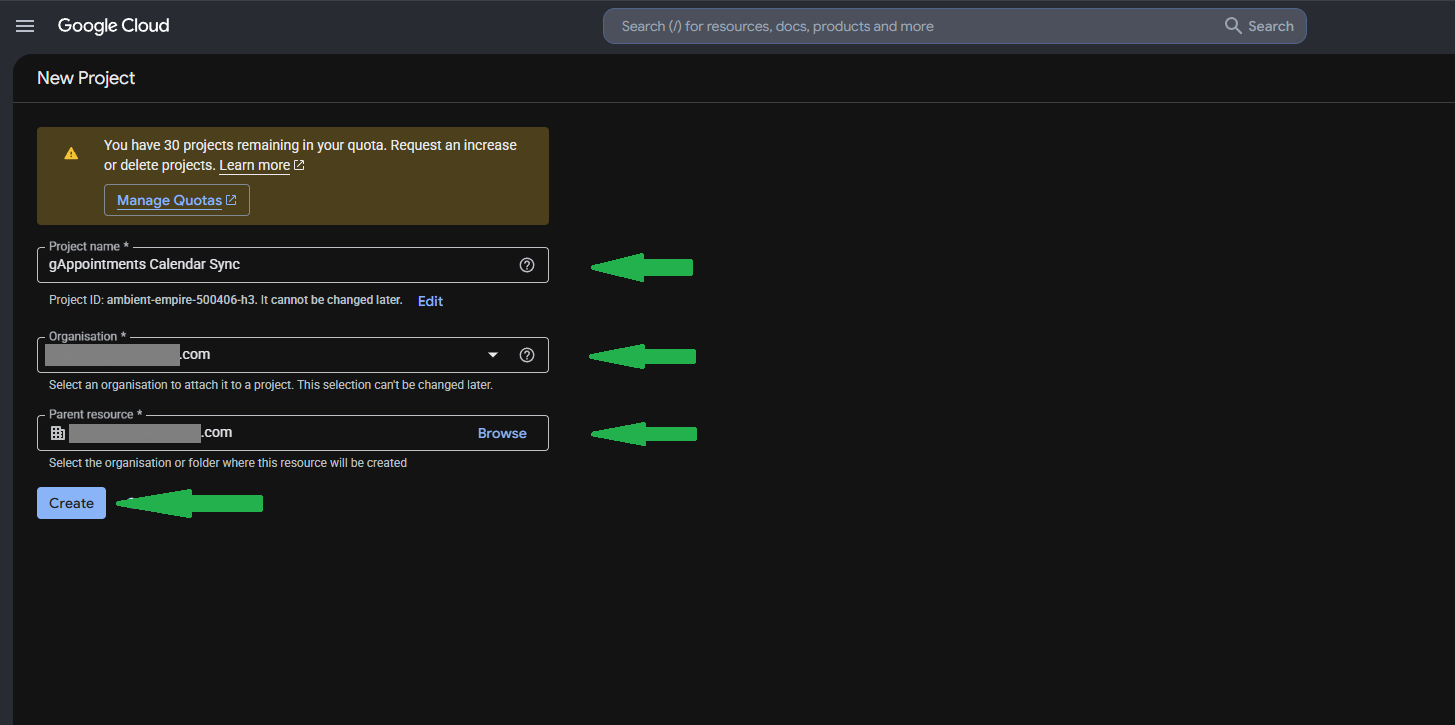
- Wait a few seconds for the project to initialise, then make sure it is selected in that same top-left project drop-down menu before continuing.

Step 2: Enable the Google Calendar API
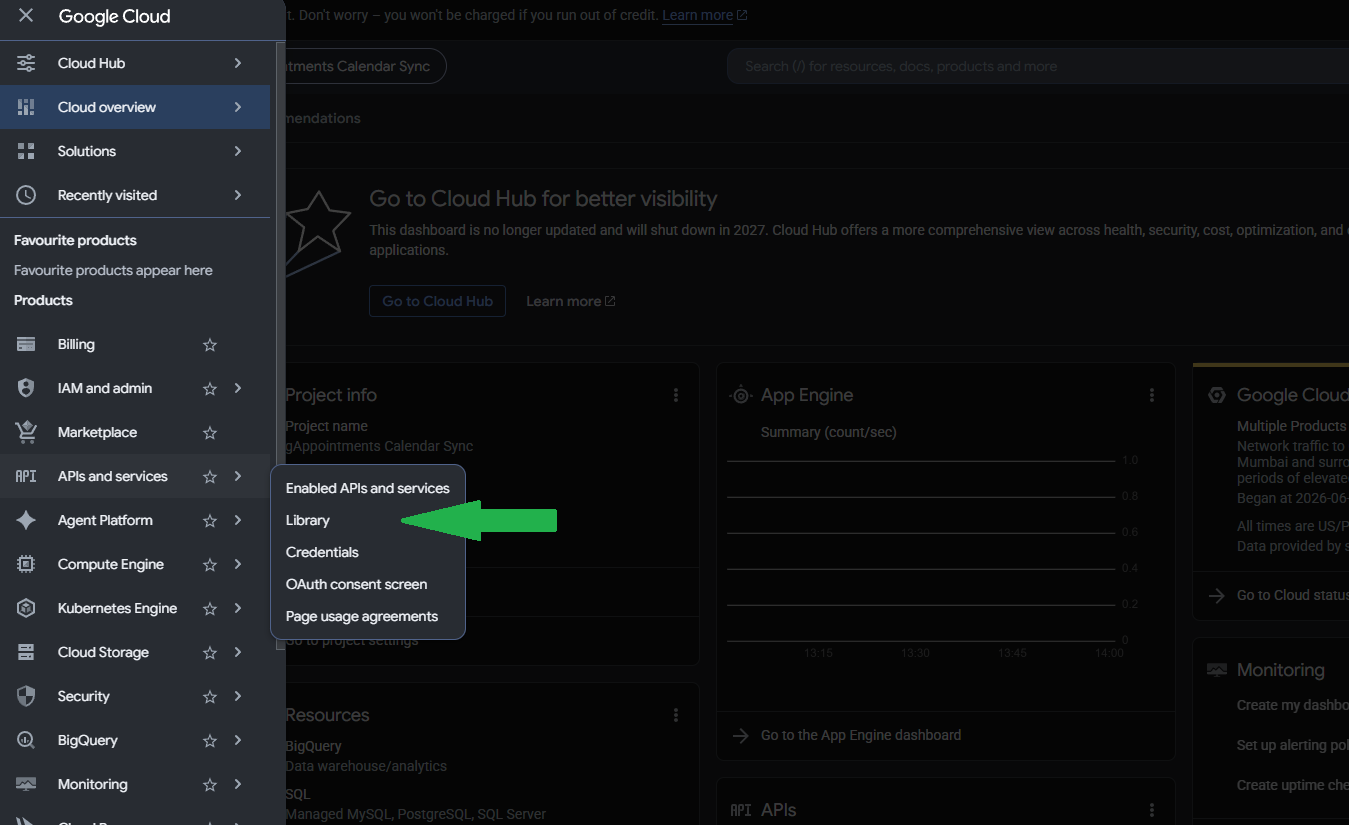
- In the left-hand sidebar, click APIs & Services > Library.
- Type Google Calendar API into the search bar and press Enter.
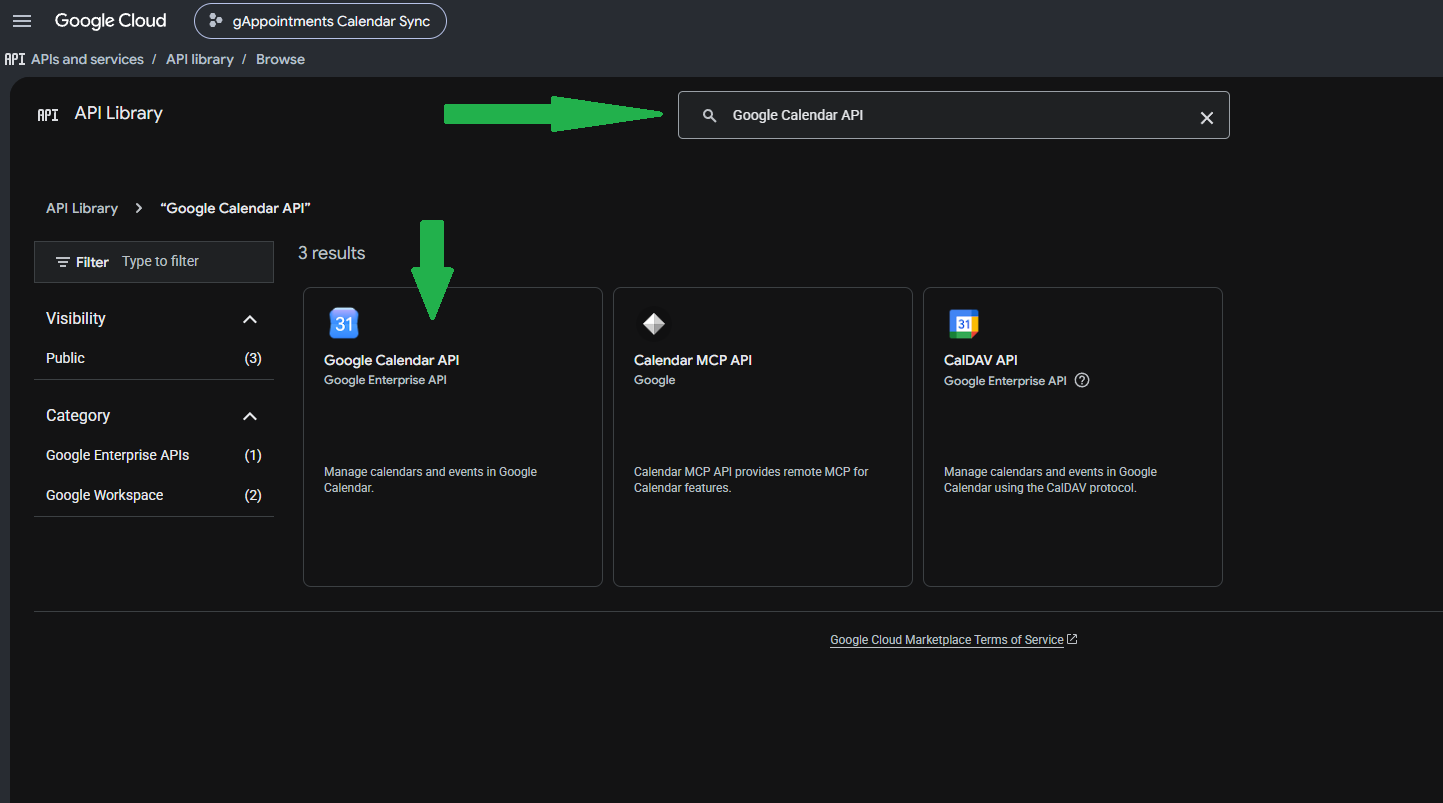
- Click the Google Calendar API result.
- Click the blue Enable button.

Step 3: Configure the OAuth Consent Screen
Because this method lets your WordPress plugin “log in” to a Google account, Google requires you to set up an authorisation (consent) screen first.
- In the left sidebar, click OAuth consent screen.

- Click Get Started (or Create).

- Fill out the mandatory fields:
App name: gAppointments Sync
User support email: choose your email address from the drop-down list.
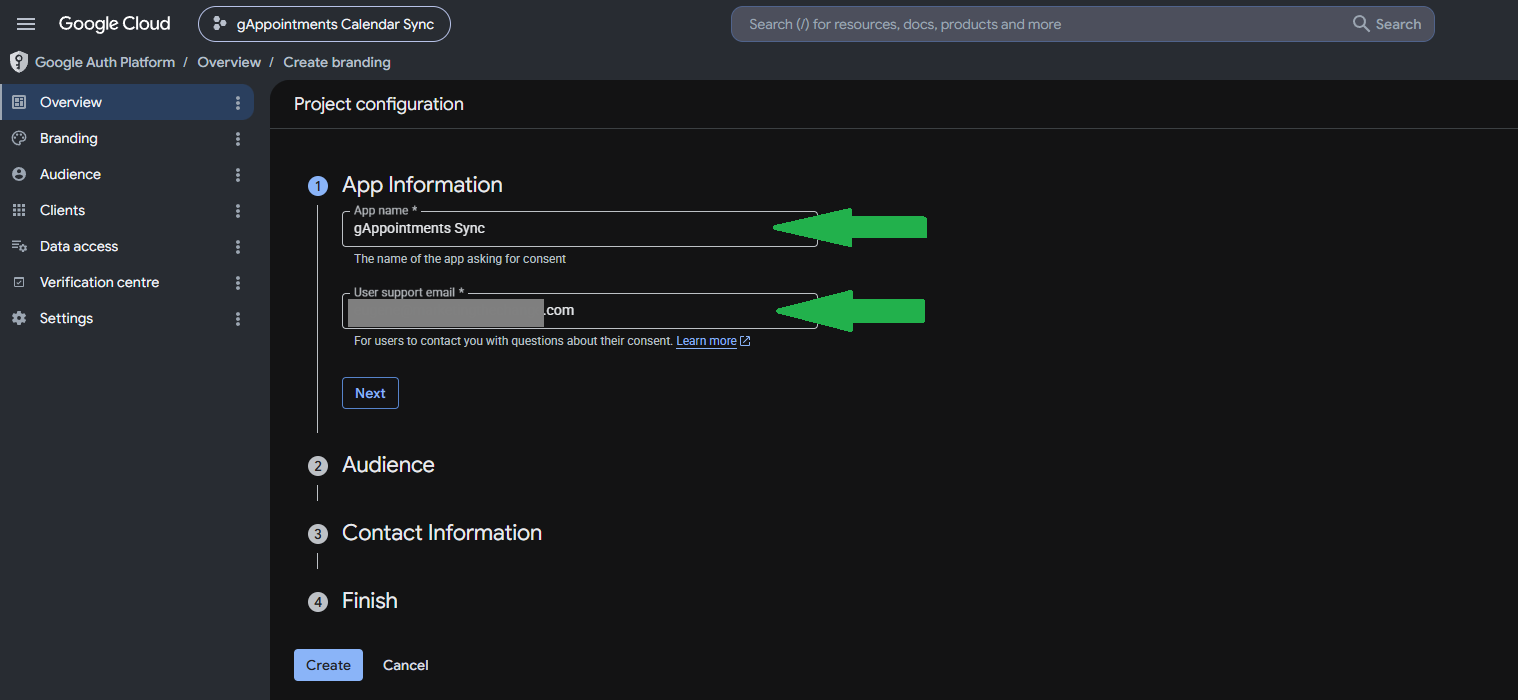
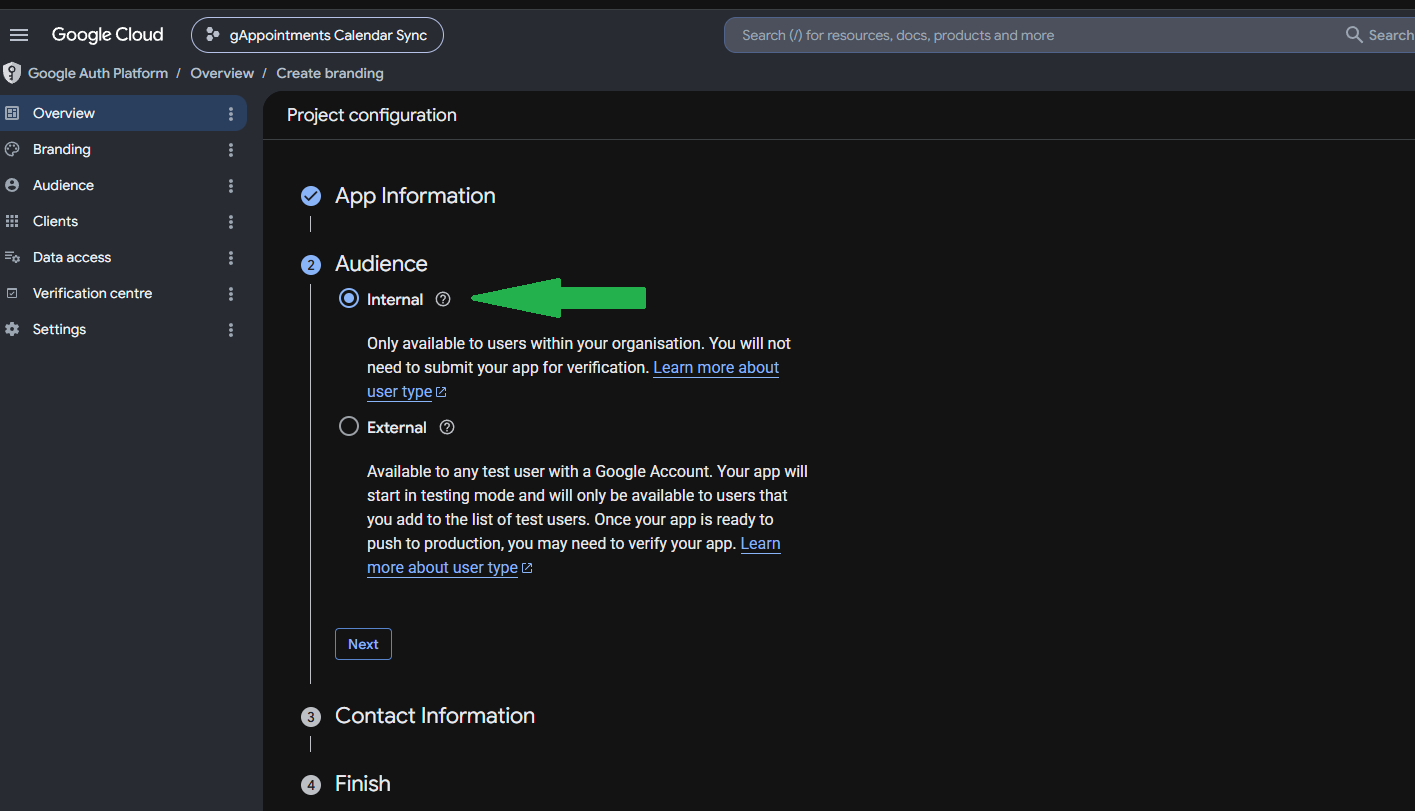
- Click Next.
- Audience: select Internal and click Next.
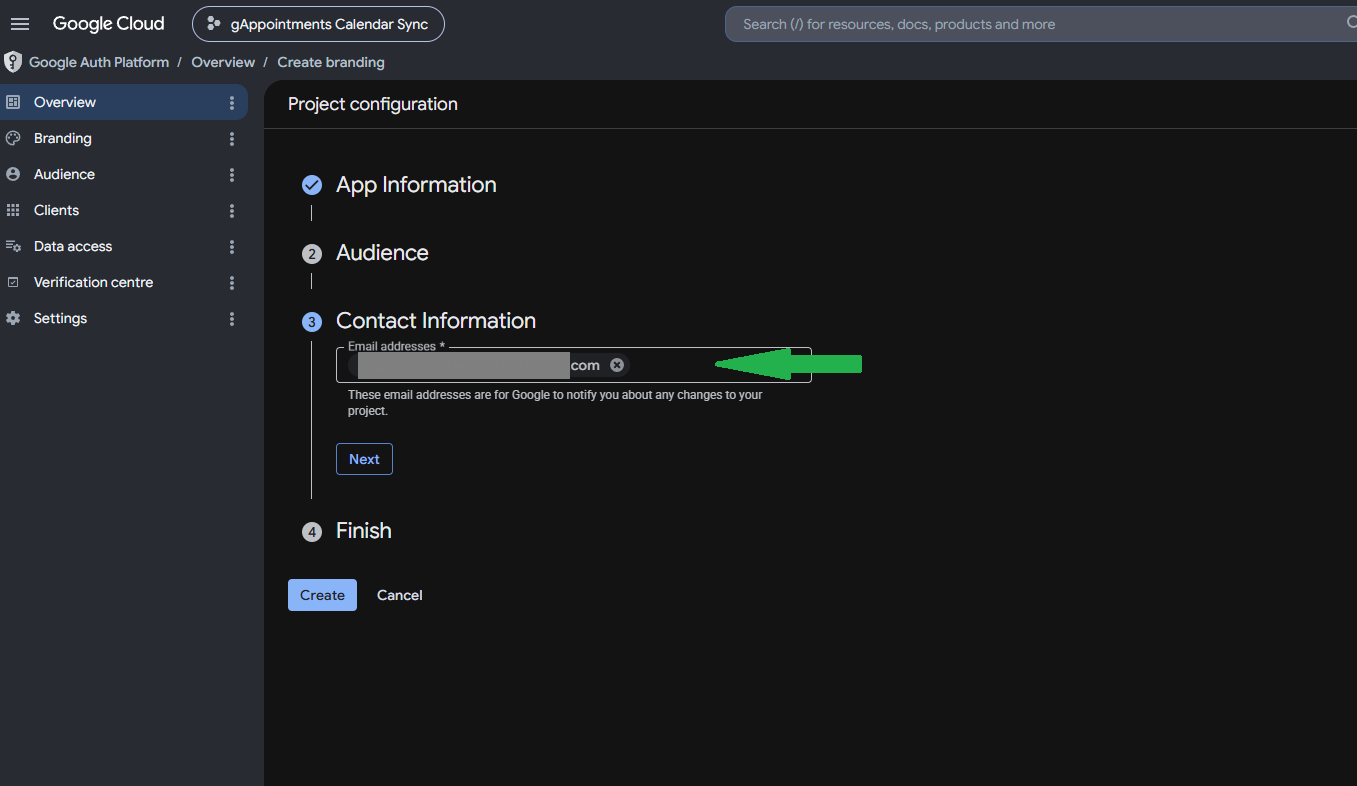
- Contact information: enter your email address and click Next.
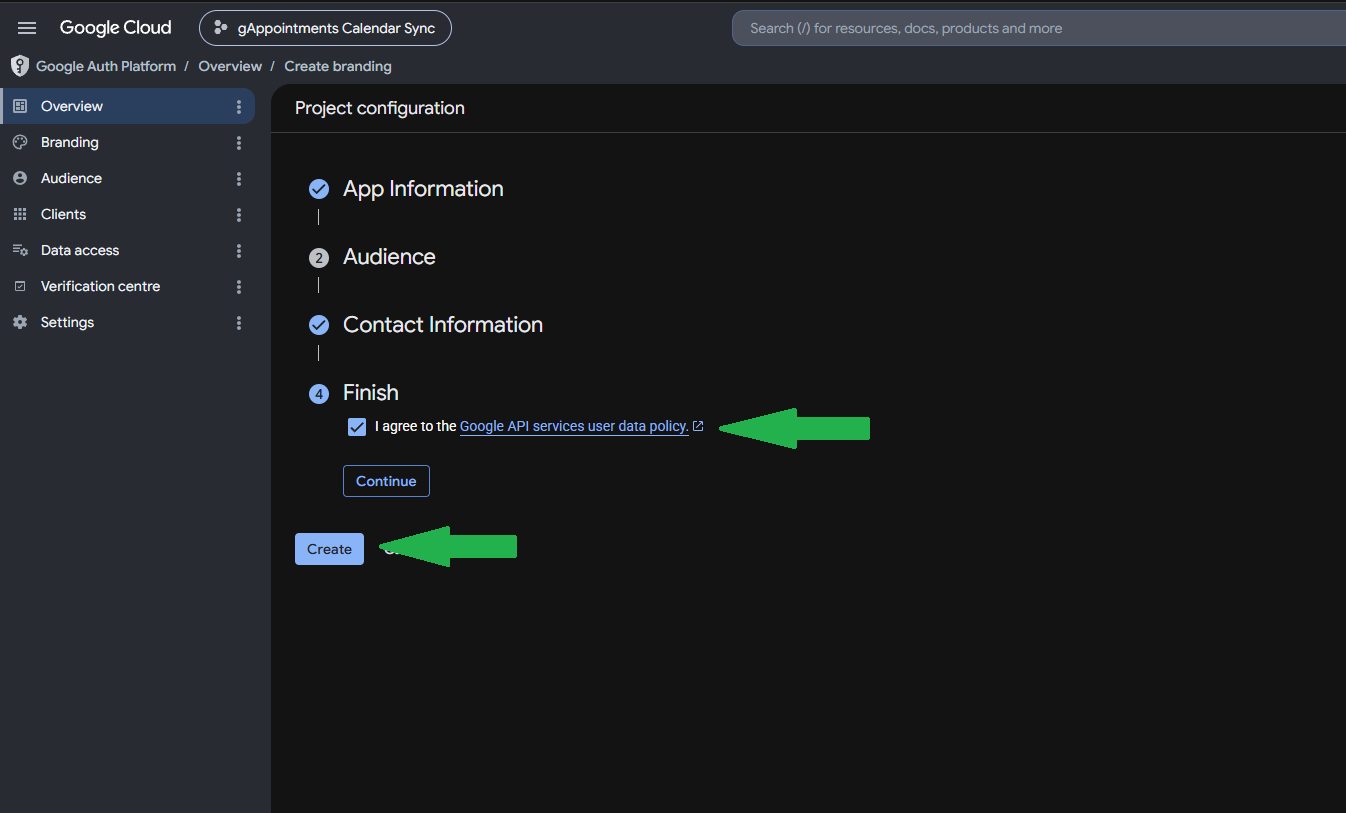
- Tick I agree, then click Create. You will be redirected to the dashboard.
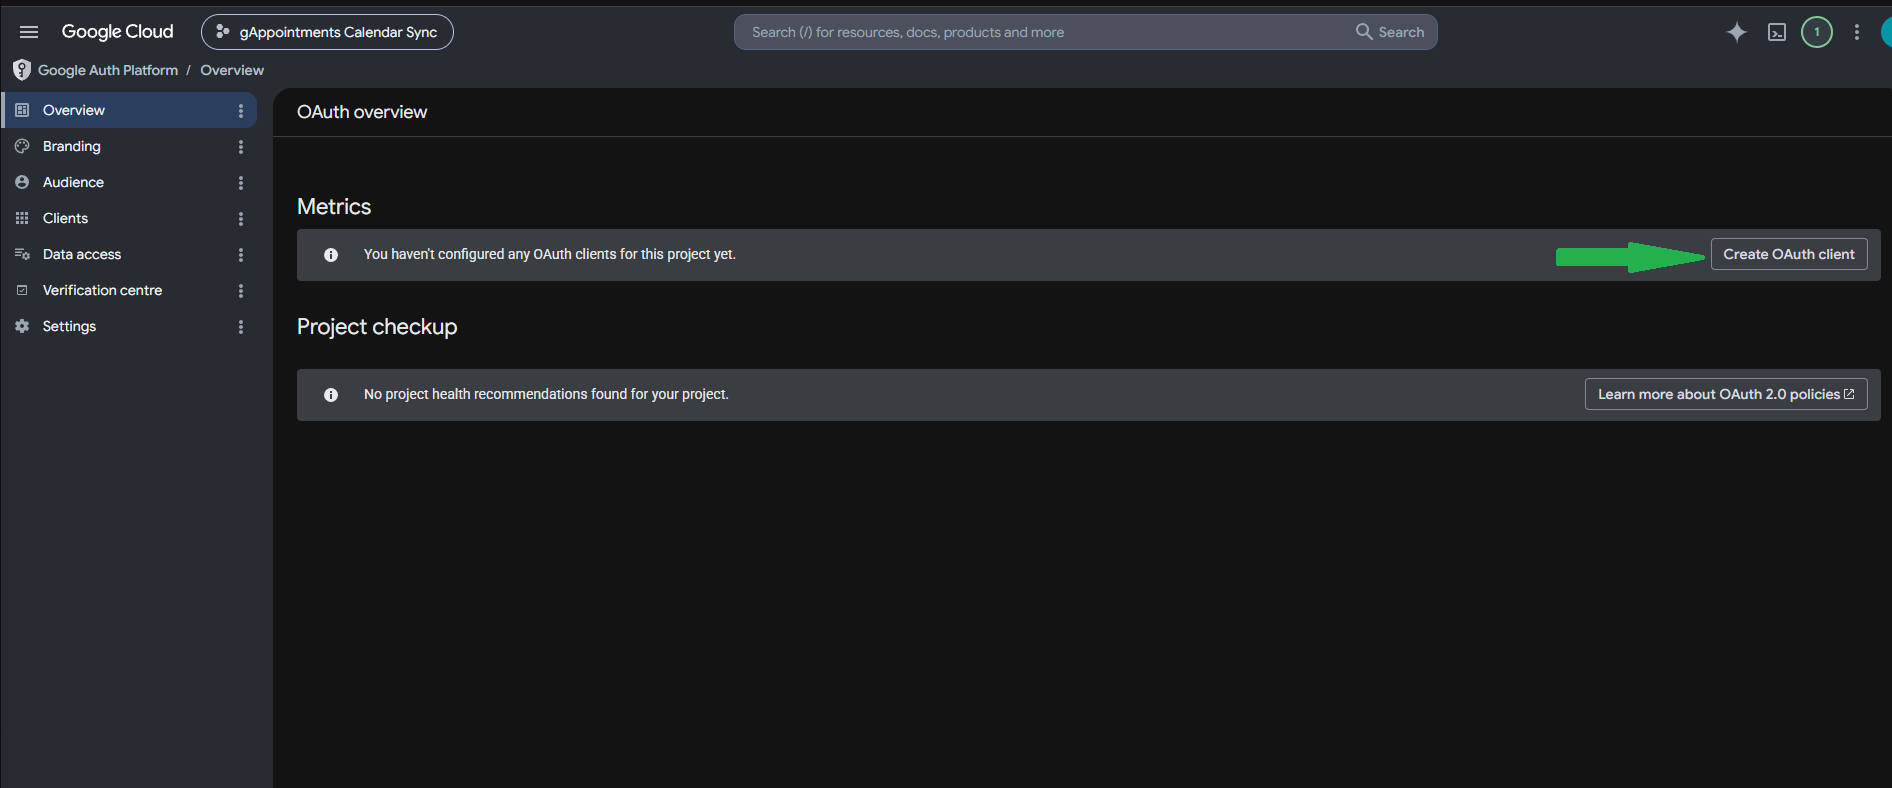
Step 4: Get Your Client ID and Client Secret
- On the right side of the dashboard, click Create OAuth Client (or click + Create Credentials at the top and select OAuth client ID).
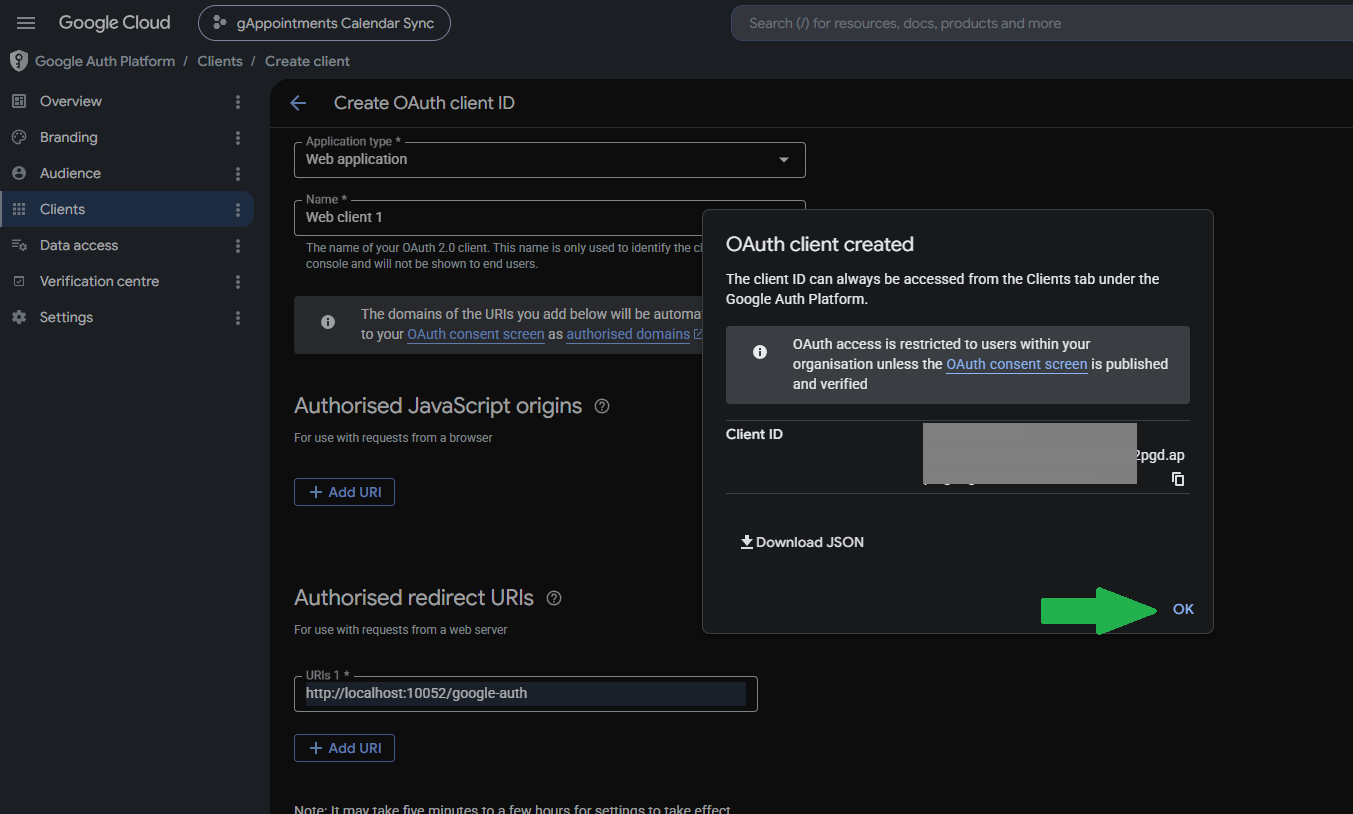
- Under the Application type drop-down, select Web application.
- Scroll down to Authorized redirect URIs and click + Add URI.
- Set the URI to
https://yourwebsite.com/google-auth— replaceyourwebsite.comwith your own domain. This exact/google-authpath is required for the connection to work. - Click Create.

Step 5: Connect gAppointments and Authorize Access
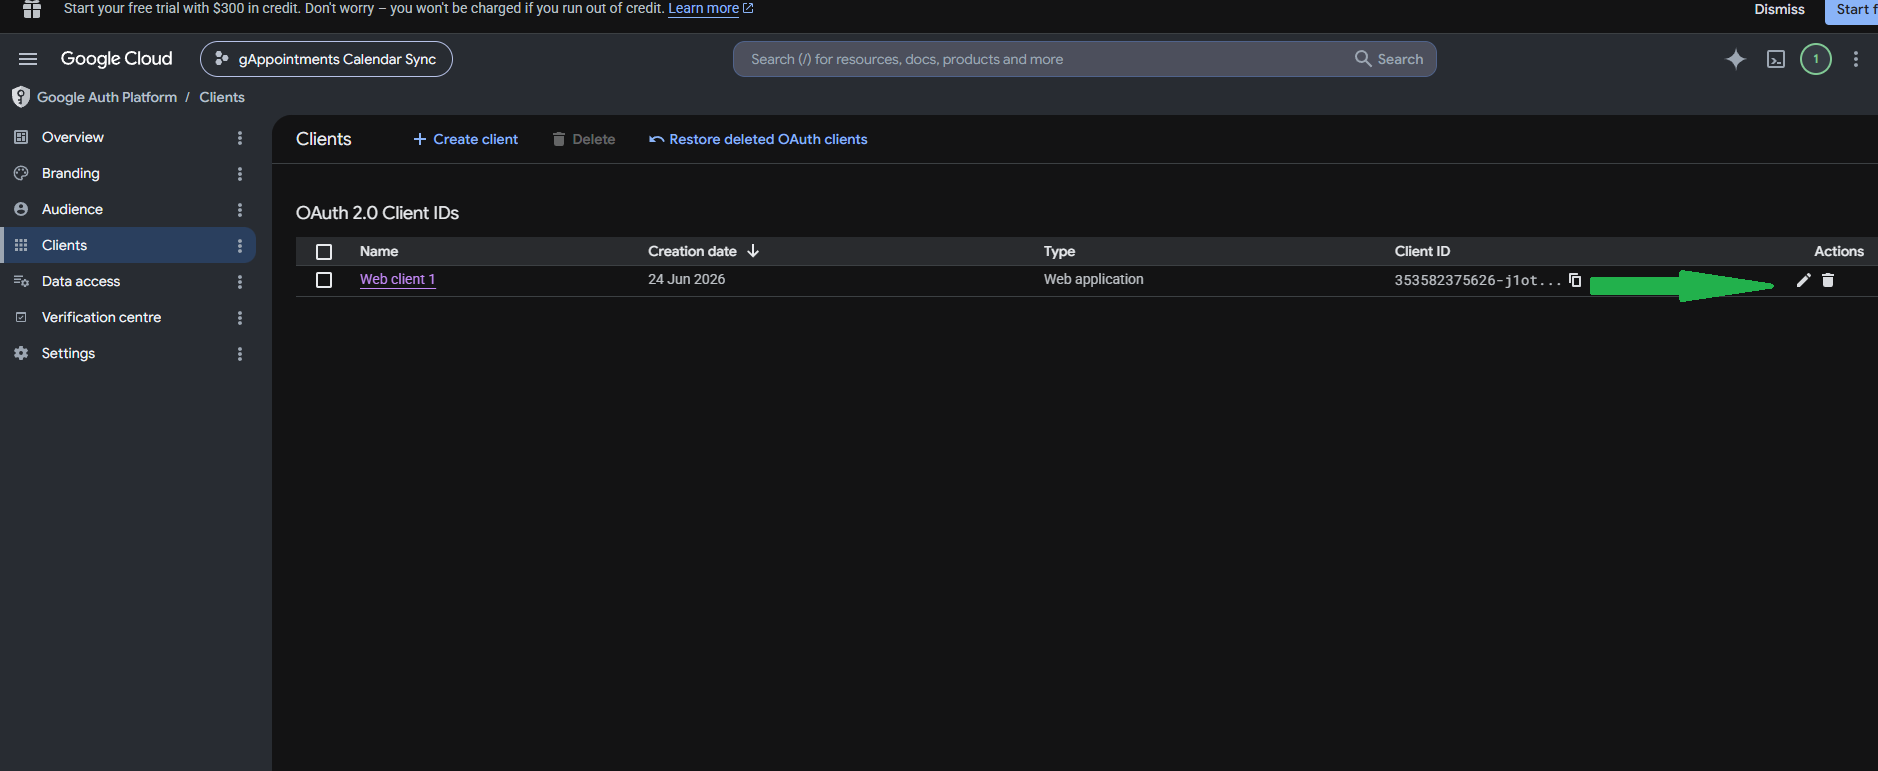
- A pop-up titled OAuth client created appears showing your Client ID. Click OK to return to the Clients dashboard.
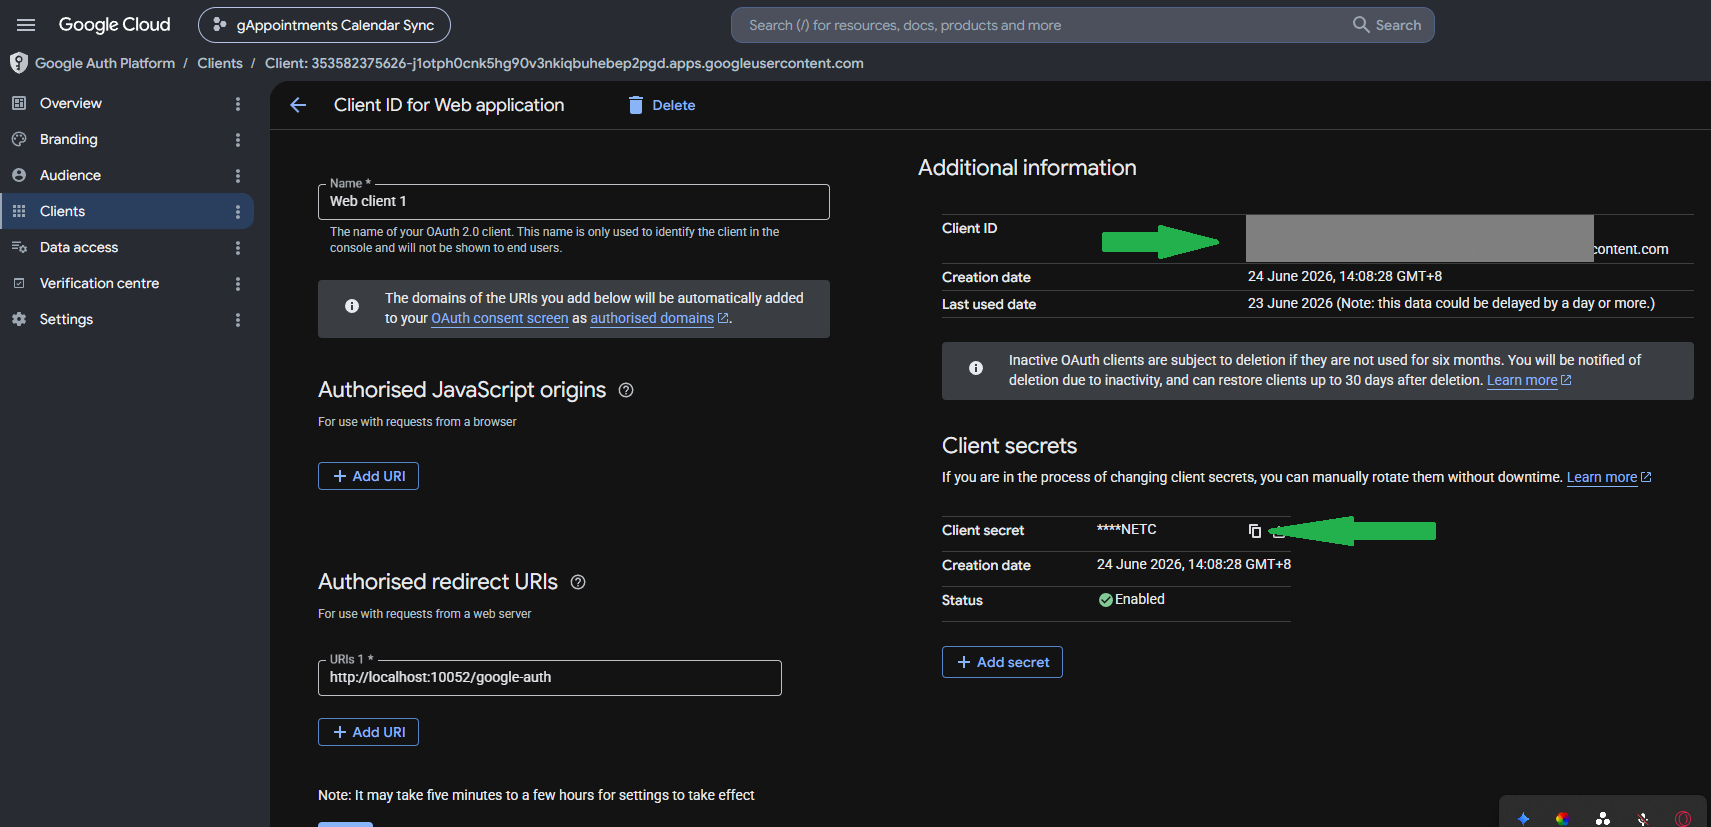
- Click the pencil icon to view your Client ID and Client Secret.
- Copy both the Client ID and the Client Secret.
- In your WordPress admin, go to gAppointments > Settings > Google Calendar, paste in the Client ID and Client Secret, and click Save Settings.
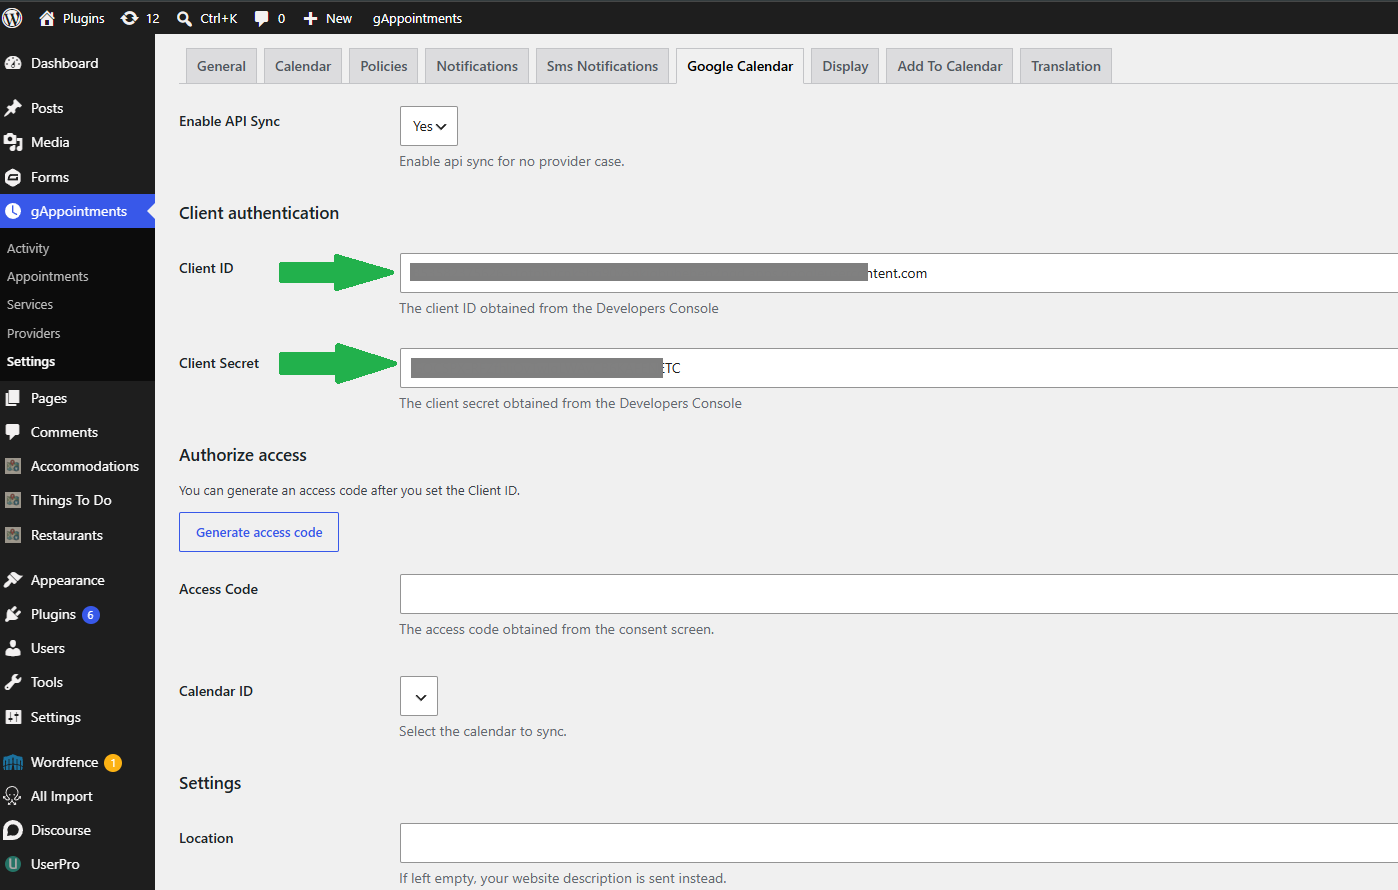
- Scroll back up to the Authorize access section and click Generate access code.
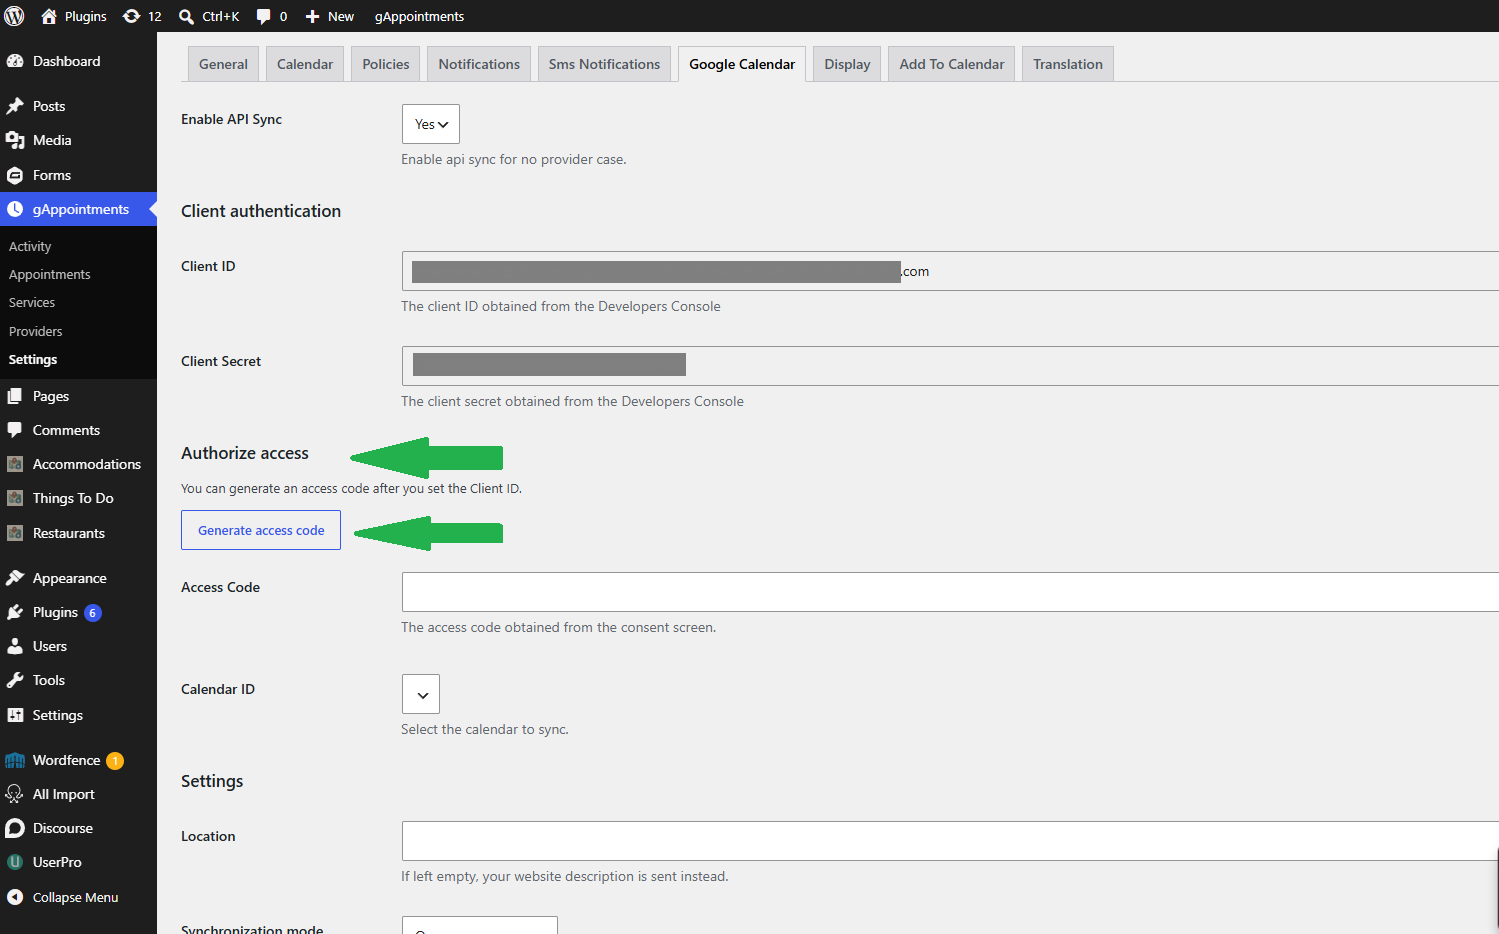
- A Google authorisation window opens. Select the Google account you want to sync and click Allow.

- You are redirected back to gAppointments > Settings > Google Calendar and the Access Code field is filled in automatically. Click Save Settings once more to finish.

Google Calendar Settings Reference
After successful authorisation, your Calendar ID appears and the following options become available:
- Calendar ID — Select the calendar to sync appointments to. By default the primary calendar is used.
- Synchronization mode — One-way sync pushes new appointments and any later changes to Google Calendar. Two-way front-end sync also fetches events from Google Calendar and removes the matching time slots before showing availability (this can add a slight form-loading delay).
- Event summary — The appointment title shown on the Google Calendar event.
- Event description — The appointment description shown on the Google Calendar event.
- Add attendee — Adds the client name & email to the Google event. Google blocks creating too many events from the same client email at once, so we recommend setting this to No and adding the client details to the event description instead.
- Colors — The highlight colour used when syncing an event.